Shackets are all the rage this season and Ellie and Mac has finally added a pattern for one to the lineup: the Connie Casual Shacket Pattern. This pattern sews up so easily and amazing in twill, flannel, denim, and all sorts of fabrics with similar weights. The pattern instructions walk you through step by step on how to get nice finishes with these fabrics. Did you know the pattern can also work in Sherpa, fleece, and other cushy fabrics that may be a bit thicker? Because these fabrics are thicker, certain tweaks can be made during construction to make sewing easier and the finishes less bulky. I chatted with some of the testers and they shared some insights on what they think will help you all. I compiled those mentions with my own ideas while I was sewing mine. Today, I will be sharing all of those tips and tricks with you! While this will be an extensive blog, the hope is to equip you with as many tips as possible to make sewing a shacket super easy peasy. Grab a cup of tea or coffee and buckle up for a long, but educational and helpful read!
Overview
- eliminate first fold from placket
- grade seam allowances everywhere (trim one in half)
- finish folded edges with bias tape or FOE (collar stand, sleeve cuff, shirt placket edge, even pockets for a neat look)
- skip the sleeve placket; spread the sleeve open/square off before cutting fabric!
- size up; if your measurements are close to the end of a size range, I recommend to size up to avoid it being too tight
- bonus: finish all internal raw edges with bias tape for a clean look
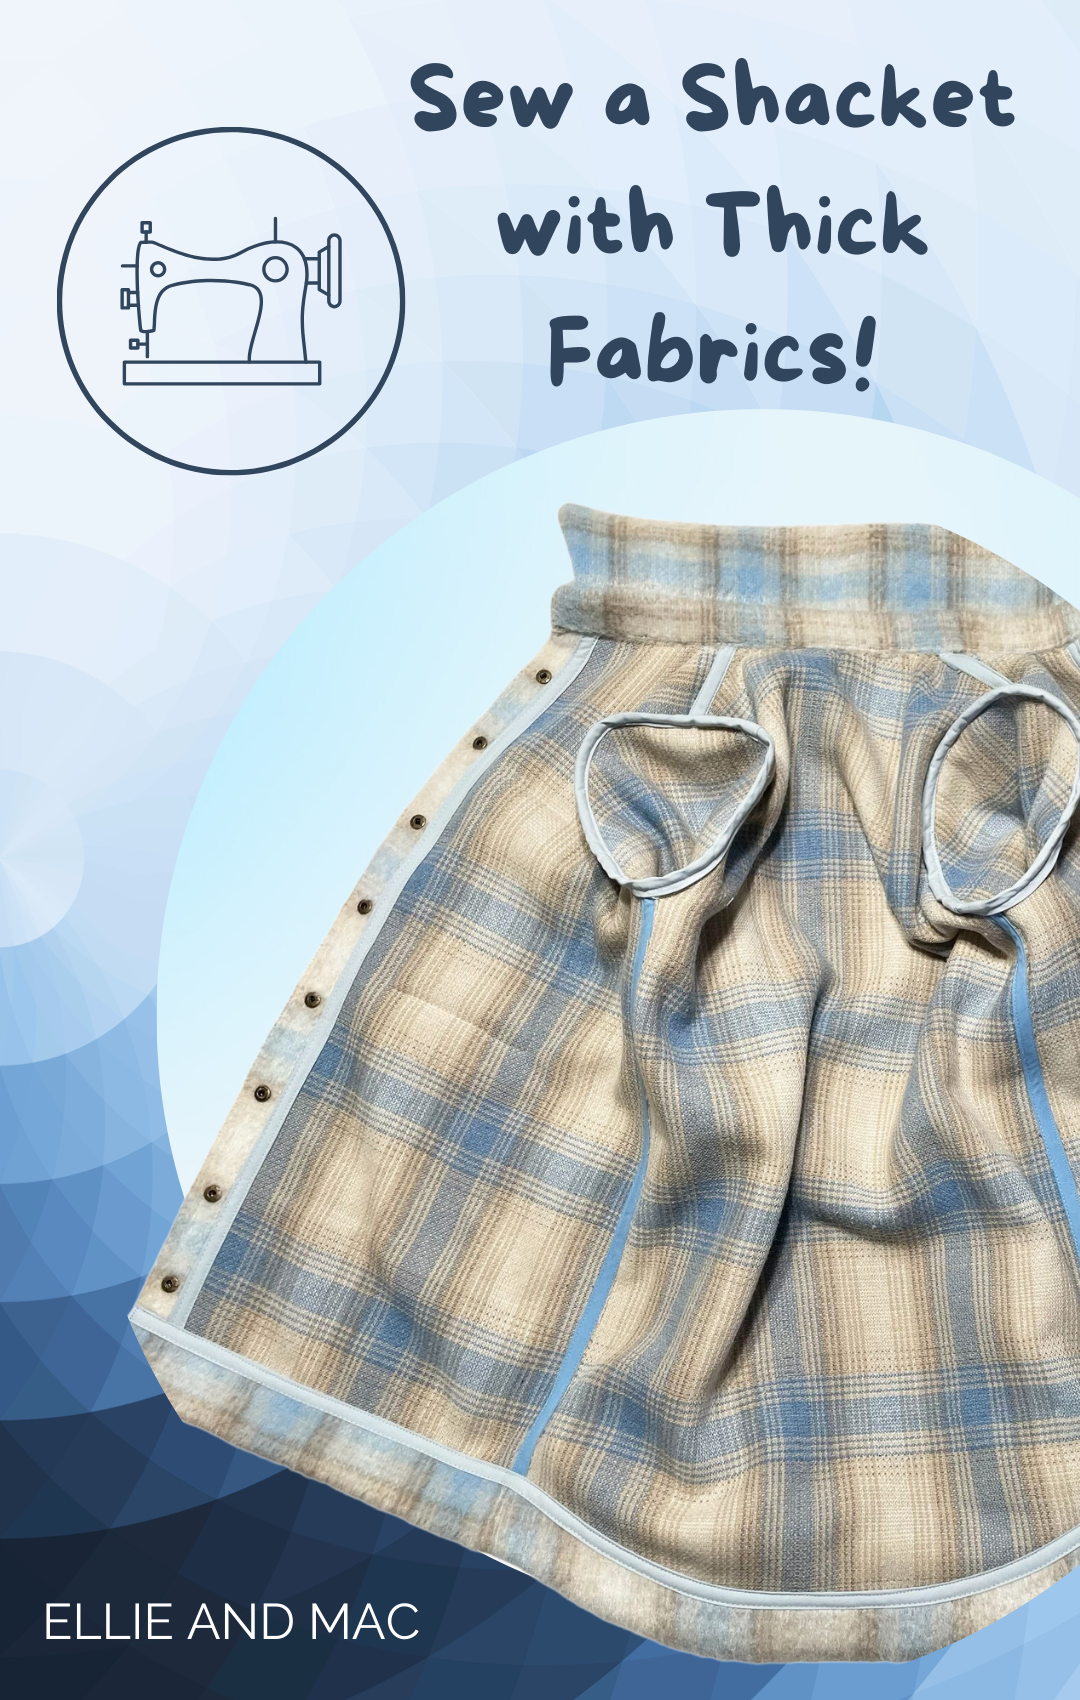
Before we start sewing with thick fabrics, we first need to consider what changes need to be made to accommodate. As mentioned above, sizing up may be a good choice if you are close to the end of the measurements for any size. After we have the pattern prepared, we must take a look at details. This pattern features a built in placket, so you achieve it by folding the front bodice over 2x to the wrong side. This can create a lot of bulk, particularly when your fabric is very thick. We know change #1 will be to eliminate this first fold. This leaves us with a raw edge. You can choose to serge it and topstitch to create the placket. I opted, instead for bias tape. I simply wrapped it over the edge and sewed it on in one step. I then topstitched from the wrong side (don't tell anyone) because I wanted to stitch on the outer edge of the binding and felt more control that way.

The other major change needed is to take a look at the sleeve placket construction. You have a couple options. You can choose to still go with it, but use a lightweight fabric for its construction. You could also opt for a bias binding placket (lots of tutorials on the internet for it). Lastly, you could eliminate it altogether by adding width to the wrist area of the pattern. I chose to square it off at the bottom, and this added about 1.5" total extra circumference. Before committing to this, I would double check that the finished wrist circumference would be adequate to fit your wrist through. I was surprised to find that it was a little tight, but once my hand got through, it felt okay. I will also note that the only way I could find to finish this was with hand sewing...so be ready for that or let me know if you find a better construction method for the cuff :) Once you have made these couple pattern changes, it's really a matter of just following the pattern instructions until you get to the sleeve/sleeve placket (if you're deciding to skip the placket, that is). You will sew the sleeve seams up, then use these instructions to sew the cuff without the placket.

The only other "changes" I made were finishing all of my seams with bias tape and using metal snaps instead of buttons. Single fold bias tape worked perfectly, but I had mostly double fold on hand. I just pressed my seams open, trimmed them down, and sewed the bias tape onto the seams. For the double fold, I just sewed without opening it. I also covered the following edges with bias tape: folded over them: the hem facing, one edge of the sleeve cuff, & the top of the pocket flap. I intended to also cover the bottom of the collar stand but I had already attached it before I remembered, so I had to brave through with keeping this thick fabric folded. I also couldn't figure out a nice way to finish the sleeve interiors, so those are the only serged seams! (Ideally all bias tape would have matched, but I ran out of two packages and had to use the closest thing I had on hand. The side seams ended up being single fold.) This thing was a feat, but I managed! In the end, because my fabric was so thick and tricky, I installed metal snaps instead of potentially messing it up with buttonholes. I quite like how that turned out!


Tester Tips
- Connie says "For anyone using fabrics with no give whatsoever, they may find that the collar stand appears too short to fit on the neckline of the bodice. In addition to staystitching the bodice neckline, they could also try: Using a slight gathering stitch instead of a stay stitch on the bodice neckline to pull it in a bit without visible gathers or cutting slits around the bottom of the unfolded edge of collar stand to allow for a little give when stretching to fit the bodice neckline.
- Jenny says "I trimmed the sleeve and button placket to make it single fold rather than double as I had thicker fabric. And I added functional poppers with decorative buttons to avoid buttonholes on the thick fabric."
- Jamie says "The things that I found useful was to Serge edges before sewing them together (mine frayed easily) and the other thing is to be extremely precise on ironing and sewing seams - so I used my seam gauge constantly, because the fabric didn’t give a crisp crease when ironing, a 3/8” fold could easily turn into 1/2” which would throw everything off. I also used a tiny bit of fray check on the clipped corners when constructing the sleeve plackets because the fabric is already so thick I didn’t want to add bulk by use interfacing, I had a tough time getting all those layers under my presser foot as it was - my walking foot didn’t want to walk anywhere LOL (and my machine is high shank)
- Sara says "My fabric didn’t stay creased when pressing so I used some little pieces of hem tape to hold them down to get nice straight top stitching (specifically on the cuff placket)"
My Tips
- If your fabric is thick and sturdy, skip the interfacing! This will help cut down on some of the bulk and layers you need to sew through. If it frays a lot, you will have to brave through it and keep the interfacing.
- For really stubborn thick areas, use a rubber mallet or hammer to gently to pound it down slightly. Take care not to hit too hard and warp or damage the fibers of your fabric.
- Press often with a press cloth and use a clapper to encourage more flat seams and crisper corners. Some fabrics are so thick they will look slightly rounded no matter how well you press, but this still helps.
- It’s always good practice to minimize stitch length at corners, but this is definitely something to be intentional about when sewing fabrics that fray easily. Reduce the stitch length to 1.4 (or even lower for thinner fabrics) so that the cut edge doesn’t get the chance to fray. Apply fray check for some extra insurance and allow to fully dry before turning right side out again.
- Opt for a lighter, thinner fabric for the inside of the cuffs, pockets, and flaps to help reduce bulk even more.
- Sample, sample, sample! This is such an important tip in sewing in general, but especially so when you put many hours into a project like this. Sample your interfacing type, sample buttonholes on the same layer of thickness (including interfacing), try out your snaps on the same layer of thickness. Test your needle and thread to make sure your stitches look nice and go up in size or change thread for better results, if needed.
I know this post has a lot of words. I know so many prefer videos instead of words, because...words can be hard to process when there are so many of them. I truly hope that the photos alongside them really help to show how easy it is to tweak the pattern for a warmer vibe. I also hope that the abundance of tips provided, not only by me, but also by the testers, are useful.
As always, if you have any questions or need help somewhere, comment below or even tag me in the Ellie & Mac Facebook group, as many others have done in the past. If you have suggestions on other methods of achieving the same results, I'd love to hear those too! Until next time...
(Written by: Lakeisha Webb)
Pattern used: Connie Casual Shacket

