Hey, Sewing Pals! Lindsey here, and I've got a fab hack for our fresh Candi Square Neck Swim Dress Pattern. Can I just say that after whipping up my first test version of the Candi Square Neck Swim Dress Pattern, I was head over heels! It's one of those "gotta wear it every day" vibes, am I right?
But here's the kicker—I'm all about active dresses, but I like 'em a tad longer than what's hanging in stores. So, I put on my creative cap and came up with a genius tweak!
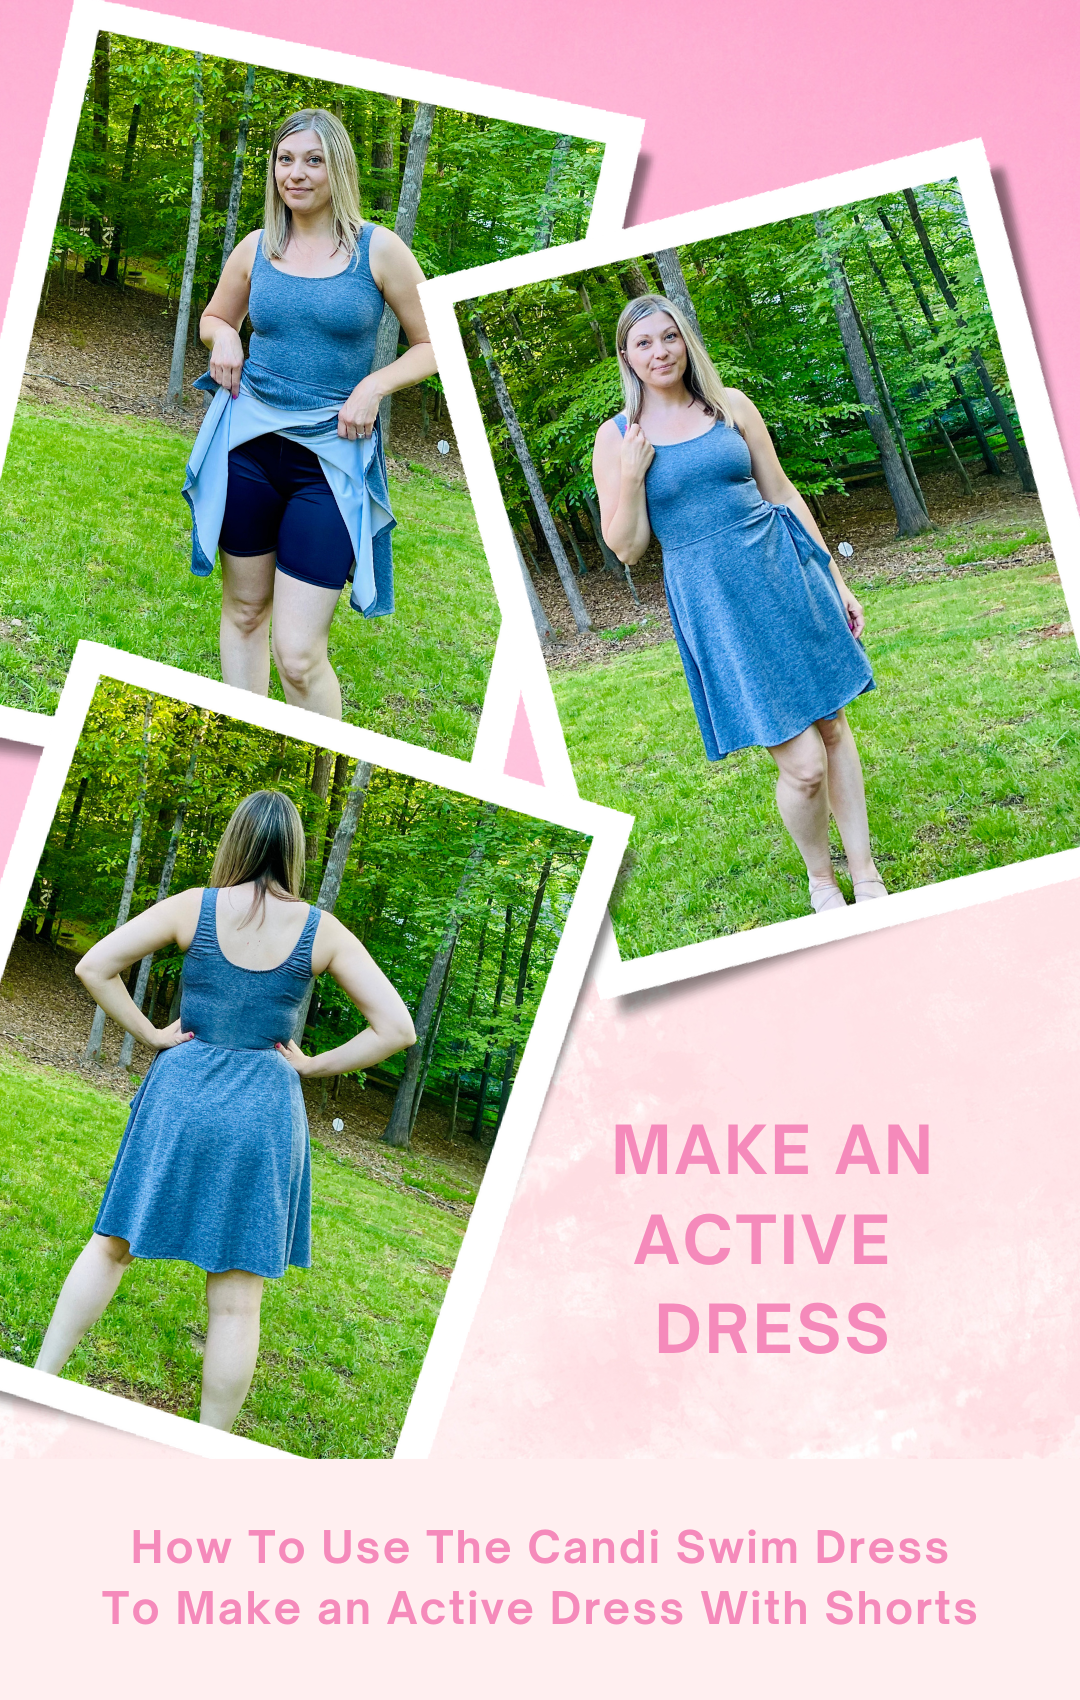
And guess what? I snagged this great Heather Grey Space Dye Athletic Knit fabric from Boho Fabrics to craft this summertime sensation! Not only does it keep me cool when the heat turns up, but here's the real kicker: no more awkward skirt mishaps when the breeze kicks in or my purse decides to play peek-a-boo! Hooray for built-in shorts!
For my active dress revamp, here's what I did: First off, I made it longer by adding 3" to the skirt length. Now, typically, I'd trim my skirt pieces down by 1" for my 5'3" frame, but not this time! So, tallying it up, that's a total of 4" extra in length.

Quick note: If shorter skirts are your jam, or if the activity you are making the dress for works with the already drafted long skirt length, go for it! It's all about your vibe and comfort level.
Repeating the length adjustment on both the front under and over skirt pieces, I added 3” to each.
Next up, I needed a trusty pair of shorts to slip underneath. Shorts are my go-to for preventing chafing and keeping things modest if my skirt decides to take flight. Initially, I gave the new Smooth Anti-Chaffing Slip Shorts Pattern pieces a whirl, but they didn't quite hit the mark for me. That's when I stumbled upon the Be Invincible Skort Pattern, and let me tell you, it was love at first stitch!

To ensure that your shorts' waist opening matches perfectly with the swimsuit bodice’s width, here’s the game plan: Measure half of the waist hem from both the back and front bodice. Match the shorts’ waistline with this width.
Then, I used the rise height from the swimsuit’s bottom front and back pieces, but that turned out too tall for my liking. I ended up reducing the rise 1” less from the swimsuit bottom rise front and 1” less for the back. I suggest trying the adjustment first before reducing.
Pro tip alert! Give those shorts a trial run before committing to stitching everything in place. Slip 'em on, strike a pose, and see if they're giving you all the feels. Adjust as needed.


Now, let's talk about my pink dress, the OG version. I attached the front overskirt to the bodice sans the ties at the sides. But, truth be told, it didn't quite tickle my fancy like the final version. In the grand finale, I kept the overskirt out of the seam and left the ties intact. Both are darling, no doubt, but those ties? They stole the show in the end!
You will sew the dress following the instructions just as if you are sewing the dress to the swimsuit bottoms. The only difference is that during the swimsuit bottom steps in the tutorial, you will skip those and sew the shorts, right sides together at the front and back rises. Press. Open and align the inseams. Sew and press. Press under 1/2" hem allowance and stitch with your preferred stretch stitch. The rest is exactly as the pattern instructions show.


I'm absolutely thrilled with how this active dress transformation panned out, and I'm crossing my fingers that you're feeling the love too! But hey, the fun doesn't stop here—my mind's already buzzing with ideas for more hacks. Just imagine all the possibilities with this adorable square neck bodice paired with different skirt and pant options! I'm all about reimagining patterns to craft something fresh and fabulous.
So, here's to embracing your creativity and having an absolute blast on your sewing adventures! Cheers to making something uniquely yours and spreading those DIY vibes far and wide!

