Flared Petal Sleeve Tutorial
Hi my friends! I’m back again today with another Hack Your Pattern installment. In today’s post, I will show you how to take a regular sleeve pattern and modify it into a petal sleeve, and then modify that one into a flared petal. I’m using a knit pattern, the Staycation Peplum and Dress from Ellie and Mac*, which you have seen me hack quite a few times before. To get started, you will need you sleeve patter, pattern paper, rulers, tape, and marking tools!
First, I like to draw a horizontal line on the paper to ensure that my sleeve gets traced correctly. If your sleeve is not cut on the fold, you don’t have to worry about this, you can just trace the sleeve. Since mine was, I traced the other half, making sure to mark the center.

Next, you will need to decide on your sleeve length. Since my end goal was a flared petal, the sleeve pattern I was using was already tall enough from the underarm down to my horizontal line (around 4.5″). If you are making a regular petal, it will look better if you shorten it to 1.5-2″ in this area. The choice is yours, or course! To begin to develop the petal, I made a vertical line down the center of the sleeve. I measured down halfway of the length length below underarm (which was 6″ down) and made a mark. Then, I measured 3.5″ over from the center of the sleeve over the cap. I narrowed the sleeve hem a touch by coming in 1/2″ from the side seam at the hem and connecting to the underarm. This step helps provide shape to a regular petal sleeve, but isn’t 100% necessary if your only goal is a flared petal. I wanted both. Make a smooth curve to connect the mark from your cap, middle of sleeve, to hem, then cross out the remaining lines.

You have your regular petal sleeve! Trim away the markings lines, label with grain, sleeve notches, pattern, and cut 2 mirrored sets. If you are making a regular petal sleeve, this is the pattern piece you will work from. Though the following steps show you how to make & sew the flared, regular petal is still constructed the same way.

Since I wanted to keep my petal sleeve pattern piece, I just traced the piece onto fresh paper to begin developing the flared petal. Then I drew vertical lines about 1″ apart across the sleeve. On fresh paper, I drew a guide that kinda looked like a plus. with only 2″ or so above. To the left, I drew maybe 6-7″ and the right 4. There was no exact science to it. We will be matching the shoulder seam to the intersection of the guide.

Cut from the hem up to the sleeve cap but not through the paper and begin spreading open your sleeve. Match the shoulder seam to the middle, and begin spreading the sleeve on the right for about 2″ touching the horizontal line. After the 2″ mark, it should smoothly curve downward. Tape these pieces in position.

On the left side, bring the corner of the underarm seam to touch the horizontal guide. Carefully manipulate the rest of your pieces into a smooth shape and tape in place. Tidy up the lines, noting that in some places you will “trim” some of the paper away, and in others you will “add.” Mark grainline on the original vertical guide, trim away excess paper on your new lines. Label with pattern name, cut 2 mirrored sets, and any other information. This is your flared petal sleeve pattern piece!

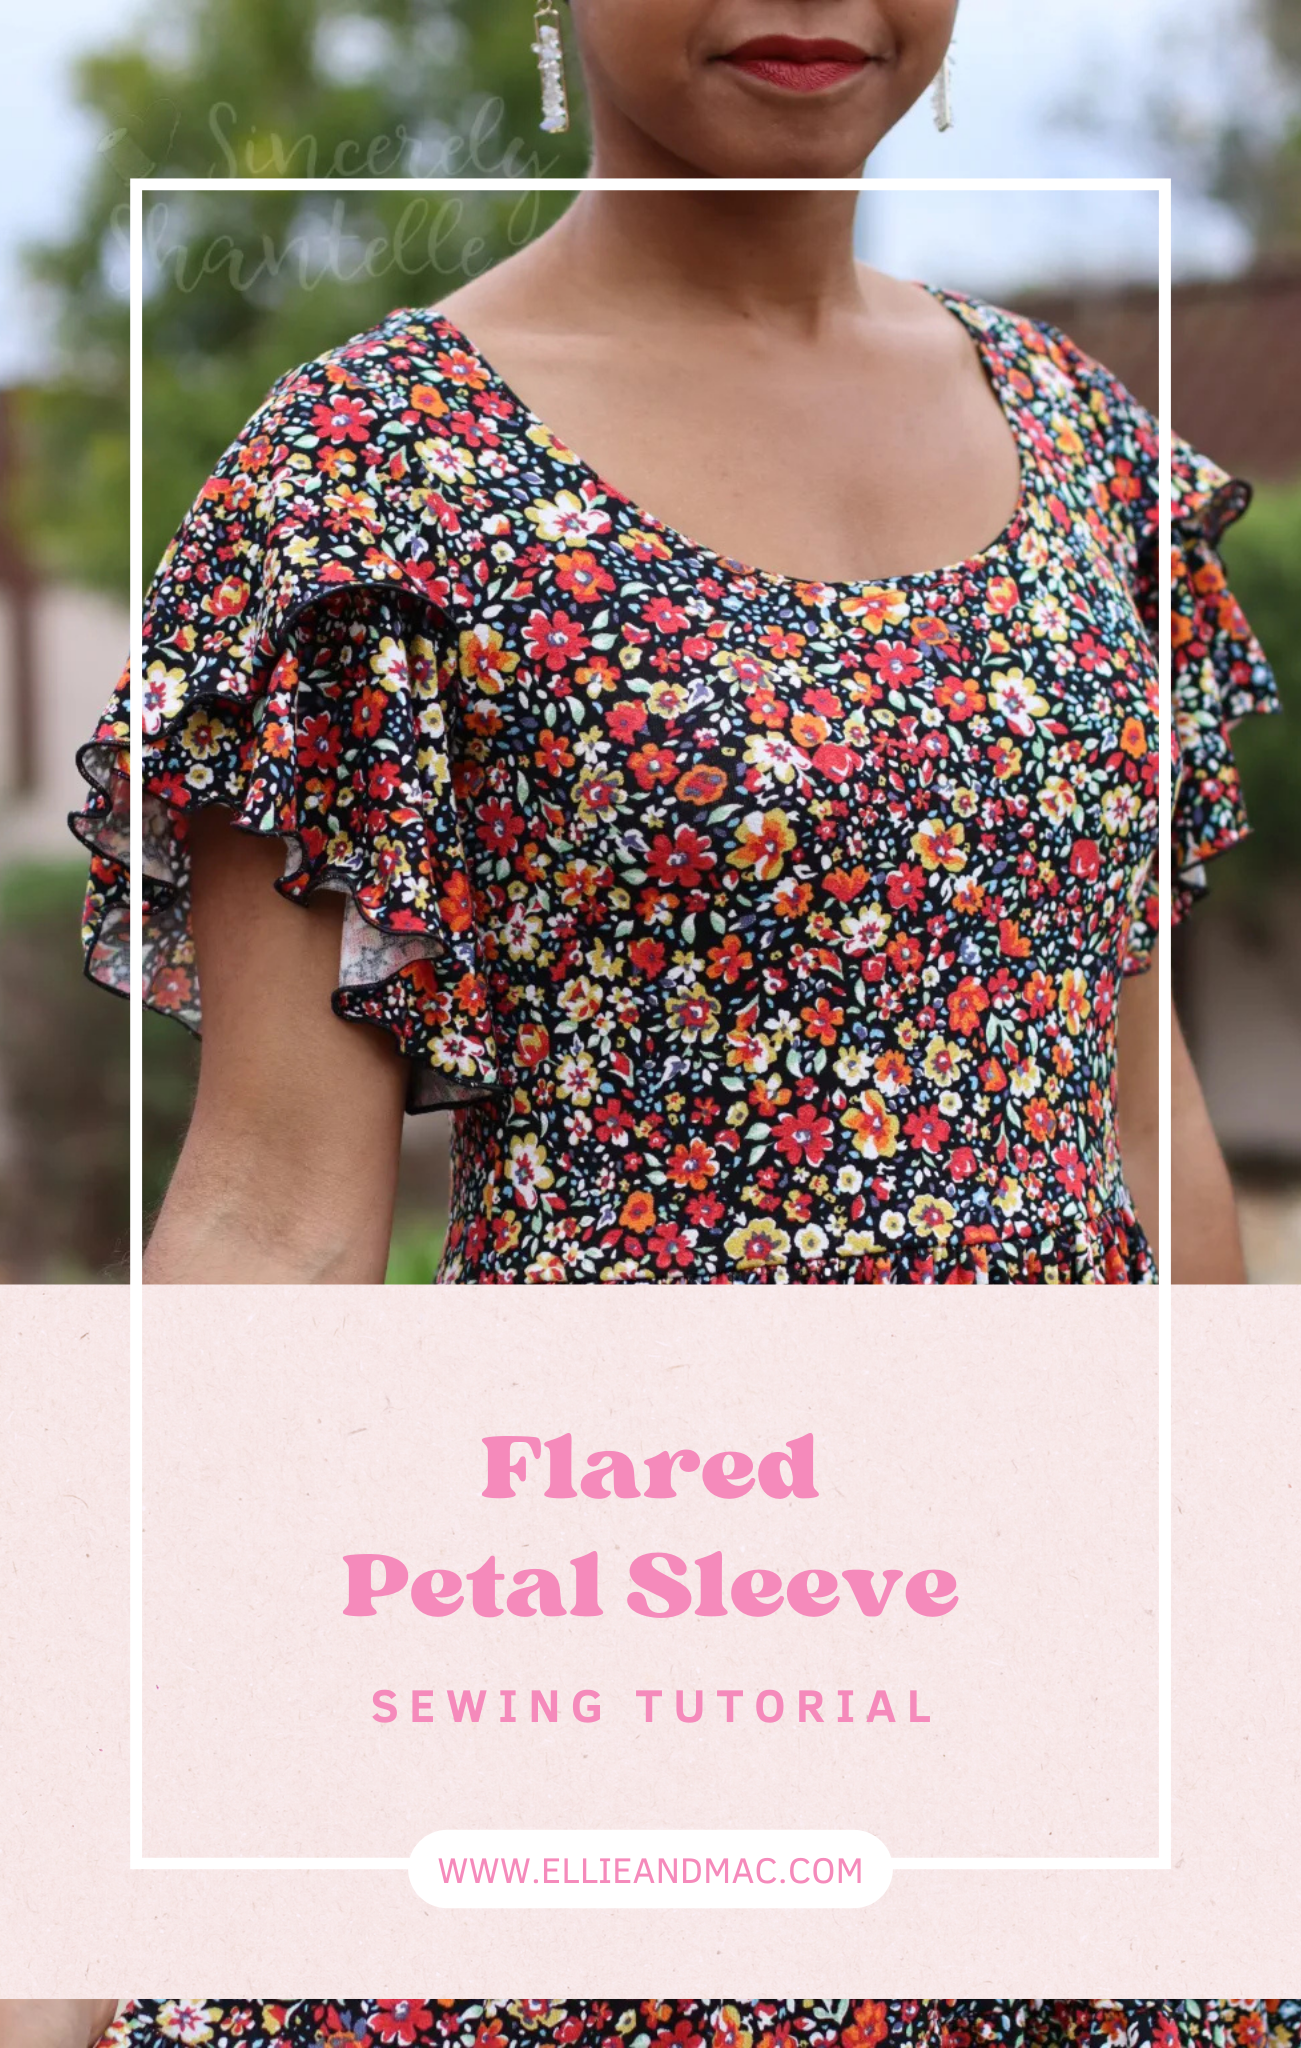
To construct, you will need to cut 2 mirrored sets for each sleeve. In this tutorial, I’m only showing you one sleeve, so there are two mirrored pieces. hem the bottom curved edge of each sleeve or you can cut liner pieces and sew them right sides together, then flip right side out. (I do not show them lined here, but maybe I’ll come back and add them some day.) If you’ve followed my dressmaking for any period of time, you’ll know I’m partial to serger rolled/lettuce hems, so that’s how I chose to finish mine. After you have hemmed or lined your two pieces, overlap them so that the shoulder notches match up. You will want to make sure that when your sleeves are laid out, they are overlapped in the same way (back over front or front over back) so your sleeves match once sewn. On mine, the back sleeve overlaps the front so you can see the crossover portion in the front. Baste along the cap of the two pieces and treat each as a single sleeve.

Fold each sleeve with the rights sides together and sew the underarm seam. Turn the bodice wrong side out and the sleeve right side out, making sure they are on the correct side of the bodice. Finally, insert the sleeve into the bodice and sew, then go back and do all the steps for the other sleeve!

I’m absolutely in love with the final dress! I love the sleeves, especially for the super lightweight rayon crepe jersey that I used. I look forward to sewing the regular petal sleeve sometime and will be sure to come back and update this post when I do.


So what to do you think? Will you try a petal or flared petal sleeve on a pattern you own? I’ve love to hear back from you, if you do! until next time 🙂
Any links in this post containing asterisks are affiliate links. The product price doesn’t change for you, but I earn a small commission when you shop from it. I appreciate your support so much!! Thank you ❤️


