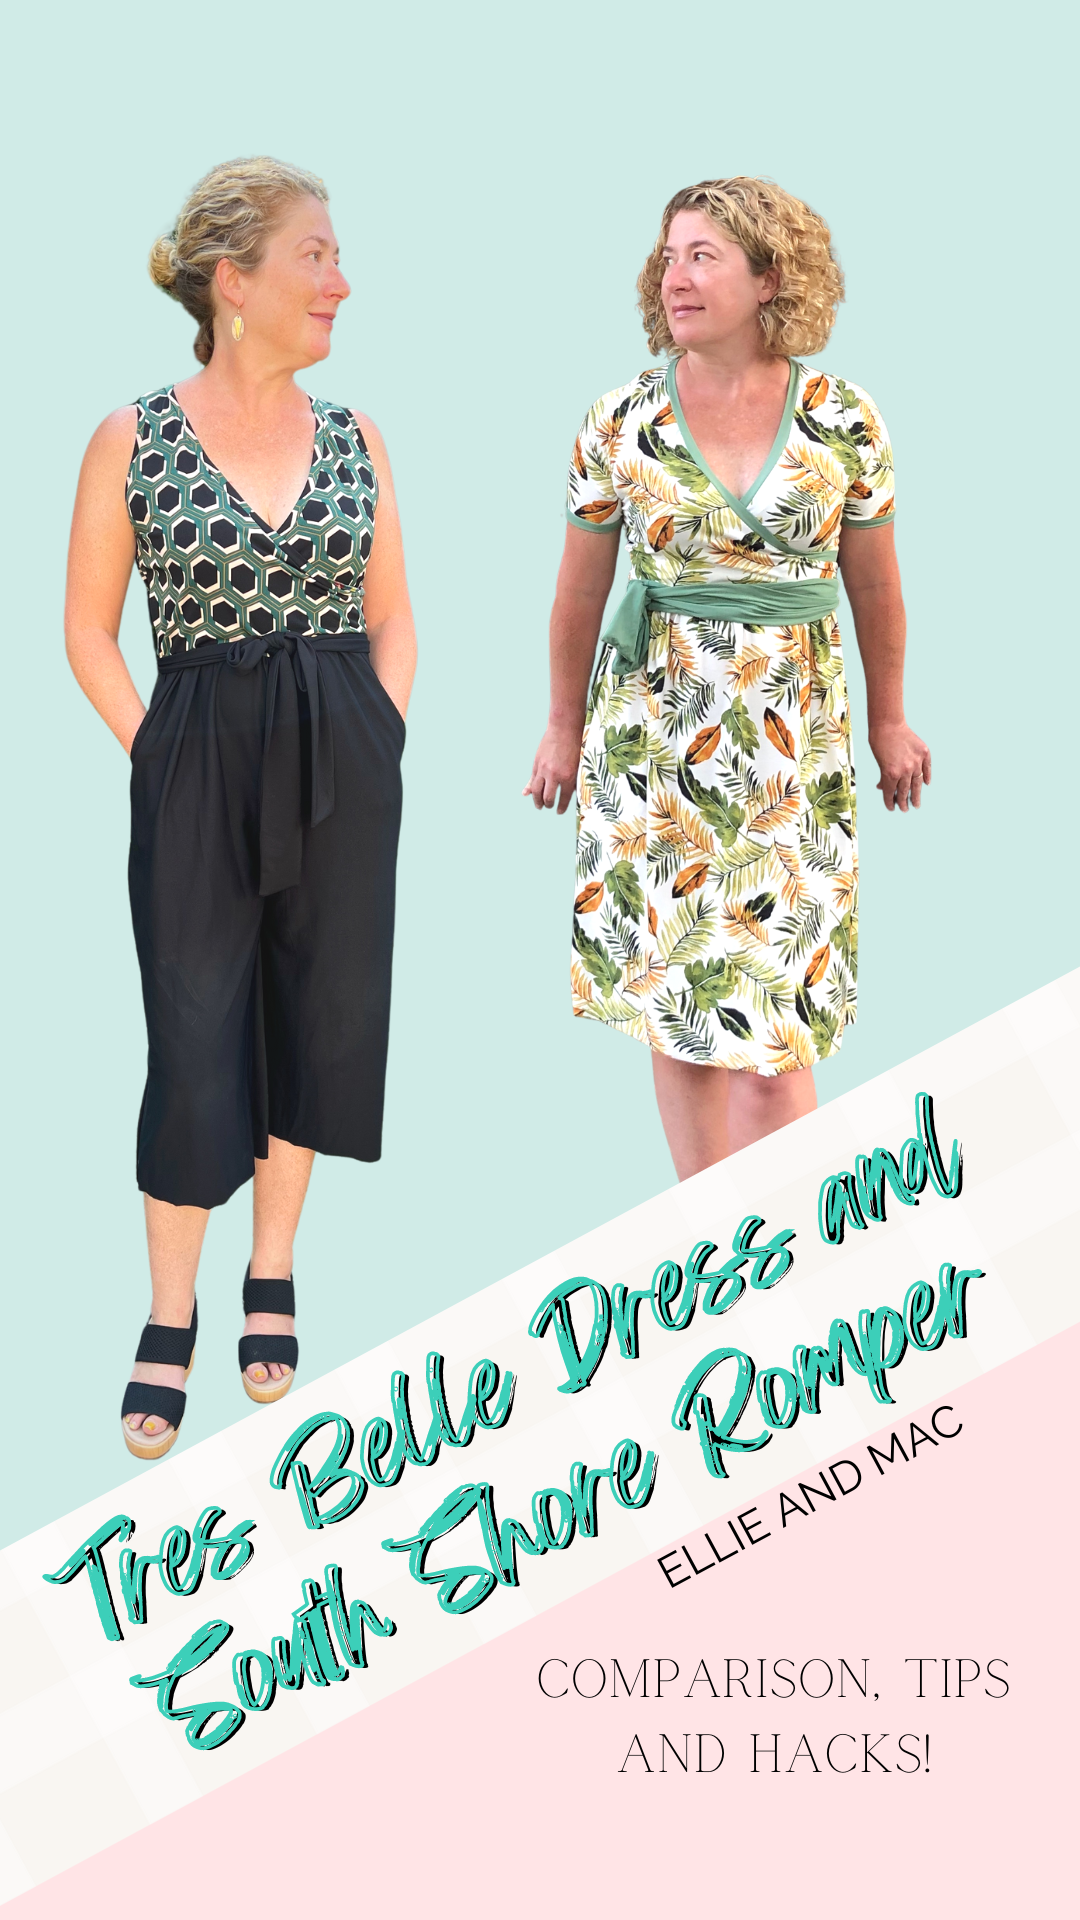
If you know Ellie & Mac patterns, then it’s highly likely you are a fan of the Tres Belle Dress, the South Shore Romper, or both! They are such well designed and versatile patterns, both providing timeless silhouettes for sewists to customize with a wide range of features and fabrics, Spring or Fall, Winter or Summer. I have made many versions of both patterns and I truly LOVE them, especially for comfortable but professional office attire.


I’m a frequent participant in the Ellie & Mac Facebook group, and so I often see posts with questions about the differences between these patterns. A common question, for example, is, “If I have the South Shore Romper, should I grab the Tres Belle?”, and, “What are the differences between these two patterns?” So today I am taking you through a tour of both patterns, comparing the drafting and the options included for each, and also sharing a few tips and hacks so you can get even more value from these awesome patterns. Here we go!
What you get with each pattern

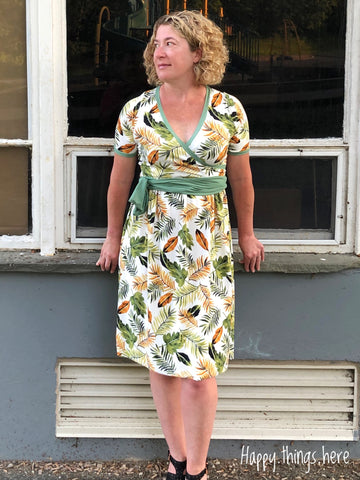
The Tres Belle Dress is a faux wrap dress and tunic pattern. With Tres Belle you get four sleeve options (tank, short, ¾ and long), four skirt length options (tunic, knee, midi and maxi) and three skirt options (gathered, half circle and full circle). It comes with an optional sash; since it has a higher waist, I tend to always use a sash or belt with this pattern. And of course – pockets for the gathered skirt and half-circle skirt option.

The South Shore Romper is (obviously) a romper pattern, meaning it is a one-piece bodice plus pants pattern. With this one you get FIVE sleeve options (tank, short, ¾, long and bell sleeves) and three length options (shorts, capri, and full pants length). It also comes with optional pockets and sash.
Comparing the patterns
One question that I see often online is – what is the difference between these two patterns, and, if I have one, do I need the other? Other than the obvious observation that one is a pants bottom and the other a skirt, the bodice is also drafted differently. Let’s take a look at the pattern pieces overlayed on top of each other:

In my photo, the Tres Belle is traced in blue and the SSR is in black. Here are the key differences I observe:
- The SSR has a longer bodice. On the size large, the bodice is about 1 inch longer. I think this helps to make the Tres Belle look more dressy (and of course fabric makes a big difference) and changes the overall look.
- The arm scythe on the Tres Belle is lower, which contributes to a different fit in the bodice.
- The Tres Belle is a slightly lower cut than the SSR.
Tips & Tricks
Here are a few tips when working with either pattern:
- Always measure your side waist – this is the distance between your arm pit and your natural waist. E&M patterns are drafted for a side waist of 8 inches. If yours is longer or shorter, you will need to modify the bodice piece for a proper fit. You can read about how to do that here.
- Don’t skip top-stitching down the neckband. It really makes a difference in fit, where if you skip this, the band wants to roll back a bit. I find that whenever I top stitch it down, I get a beautiful fit.
- Basting definitely helps avoid pulling out that seam ripper (or having tears of regret with a serger!). Specifically when you are attaching the front cross-over pieces and the back bodice at the sides, you will sometimes have two layers of fabric. Especially if you didn’t top stitch down that band, your band may flip up or not get fully caught in the side seam. You could even baste one layer at a time. Tip – I do a very narrow seam allowance when basting so that the basting stitches get cut off when I serge.
Modesty Hacks
For both patterns, let’s talk about modesty hacks. Being a smaller chested person, I find cross-overs overall dip a little low for me…probably because I’m not…ummmm….really filling up that bodice. So when I make these patterns, here are the changes I often make to get a little more coverage:
- Skip the step where you gather the front side pieces. This slightly raises where the cross-over pieces intersect your chest.
- Add width to the neckband. In two of my SSR hacks, I added a whole inch to the width and I really like the look – plus it gives me way more coverage.
Original Pattern Views
I’m excited to share my makes with you! First, here are my versions of the Tres Belle and South Shore Romper sewn mostly per the pattern instructions.
This Tres Belle below was my very first finished version I sewed up when I was a tester on the pattern. This one is a size medium, no modifications.

Here is one of my favorite South Shore Rompers, only deviation from the pattern here being that I did skip gathering the sides. I did the capri view.


Here come the hacks!
But if you know me and have seen my other blog posts or Instagram shares, you know I can’t NOT do some hacks when I love a pattern. So here are three hacks for these patterns with instructions on how to achieve these looks.
- Tres Belle with a waistband
I wanted a version of the Tres Belle I could wear without my sash so I made a waistband to go between the bodice and skirt. This is a simple medication! First, decide on the approximate height of the band you want. I recommend sewing up the bodice and trying it on, noting where you would like the waistband to begin and end, then double that for the height of the piece (since you will be folding it before you sew it. Cut a piece that high plus double the width of your bodice (plus ½ inch extra for seam allowance). Join the waistband piece, then fold height-wise and align the two raw edges with the raw edges of the bodice. Sew this piece on, then complete your skirt. Attach the folded edge of the waistband to the edge of the skirt, and you’re done! The height of my waistband piece for this hack is x inches. Note – when you add a waistband this adds overall length to the dress, which I like because I usually add a few inches to the skirt anyway.


- South Shore Romper top
I chose the SSR bodice for my top versus the Tres Belle because it is longer. For this hack, I did not do anything to the length of the bodice, but similar to the hack above, created a waistband piece in the height needed for the look I wanted to achieve. The height of my waistband piece for this hack is 6 inches in height total, or 3 inches when folded and attached. Note that this top definitely has a bit of a cropped feel, so if you want something with more coverage, add length to either the bodice or the waistband.

- South Shore Romper Body Suit!
Ok, I think this is my favorite and most recent hack to this pattern! I used the SSR bodice but this time, I added three inches to the bodice. I also increased the width of the neckband by one inch and skipped the side piece gathering. I then used the high waisted version of the Feel Frisky panties pattern which I simply sewed up (without the waistband elastic) and attached to the SSR bodice. I basted my first version and then removed an inch from the height of the bottom piece. I preferred to do this versus shorten by bodice because I did not want the seamline showing. Another option here is to use the mid-rise version. And if you love this and are happy with the fit, you could also retrace the SSR bodice to join the Feel Frisky pieces for a seamless fit. One other idea – you could use the bodysuit bottom piece from the Puffed Sleeve bodysuit which also includes instructions for adding snaps. Since this is a crossover top, I was able to easily get this on and off.
In the below photos I’ve paired the body suit with most favorite navy blue Not So Basic pants.


Do you have any favorite hacks or tips for these awesome patterns? We would love you to comment or share in the Facebook group. I hope you enjoyed this post and have gotten to know these patterns better!
Get the Tres Belle here.
Grab the South Shore Romper here.
Pick up the Feel Frisky Panties here.
Find the Not So Basic Pants here.
Happy Sewing!
(Written by: Andrea Mulford)
*this post contains affiliate links


