Hey Ellie and Mac readers! Jessica here, back again with another blog post. I usually blog over on the Let's Go Hobby Blog. You can check out my Ellie and Mac posts by clicking HERE.
I have written a few other posts for Ellie and Mac including the:
Today's Pattern Mash

Today, I'm here to tell you about a fun pattern mash involving the Be Invincible Skort:

The Be Invincible Skort pattern has options for:
- An open skirt style
- A wrap skirt style
And also, as seen in the picture above:
- two different shorts lengths,
- and a short or tall waistband height
I saw this skort pattern and thought, that's way cute! It would be perfect for warmer weather, but what about for Fall and Winter? And then, I had a light bulb moment, full leggings! Of course!
Not only will this be perfect for cooler weather, but it's also really cute. It's a great option too if you want or need to cover your legs but want the look of a skirt. Or, if you want to wear leggings, but have a bit more coverage.
So, to achieve full length leggings to go under the Be Invicible skirt portion, I used the Ellie and Mac Urban Leggings pattern as seen below.

As you can see in the pattern depiction, these are basic leggings with 4 different length options and 2 different waistband heights.
A perfect legging extension to the shorts on the Be Invicible pattern!
The Mash Instructions

Mashing the two patterns was actually extremely simple, even a beginner shouldn't have trouble with this one.
First, grab your patterns:
Next, find your size and print the patterns. If you need any help knowing how to print or assemble PDF patterns, you can check out my PDF 101 blog post HERE which is a comprehensive step-by-step tutorial all about PDF Sewing Patterns.
Once you have everything printed and cut, you will need to decide which waist band height you prefer. I chose the tall waistband style.
Lay that Be Invincible Shorts pattern piece on top of the Urban Leggings pattern pants piece as seen in the picture below.
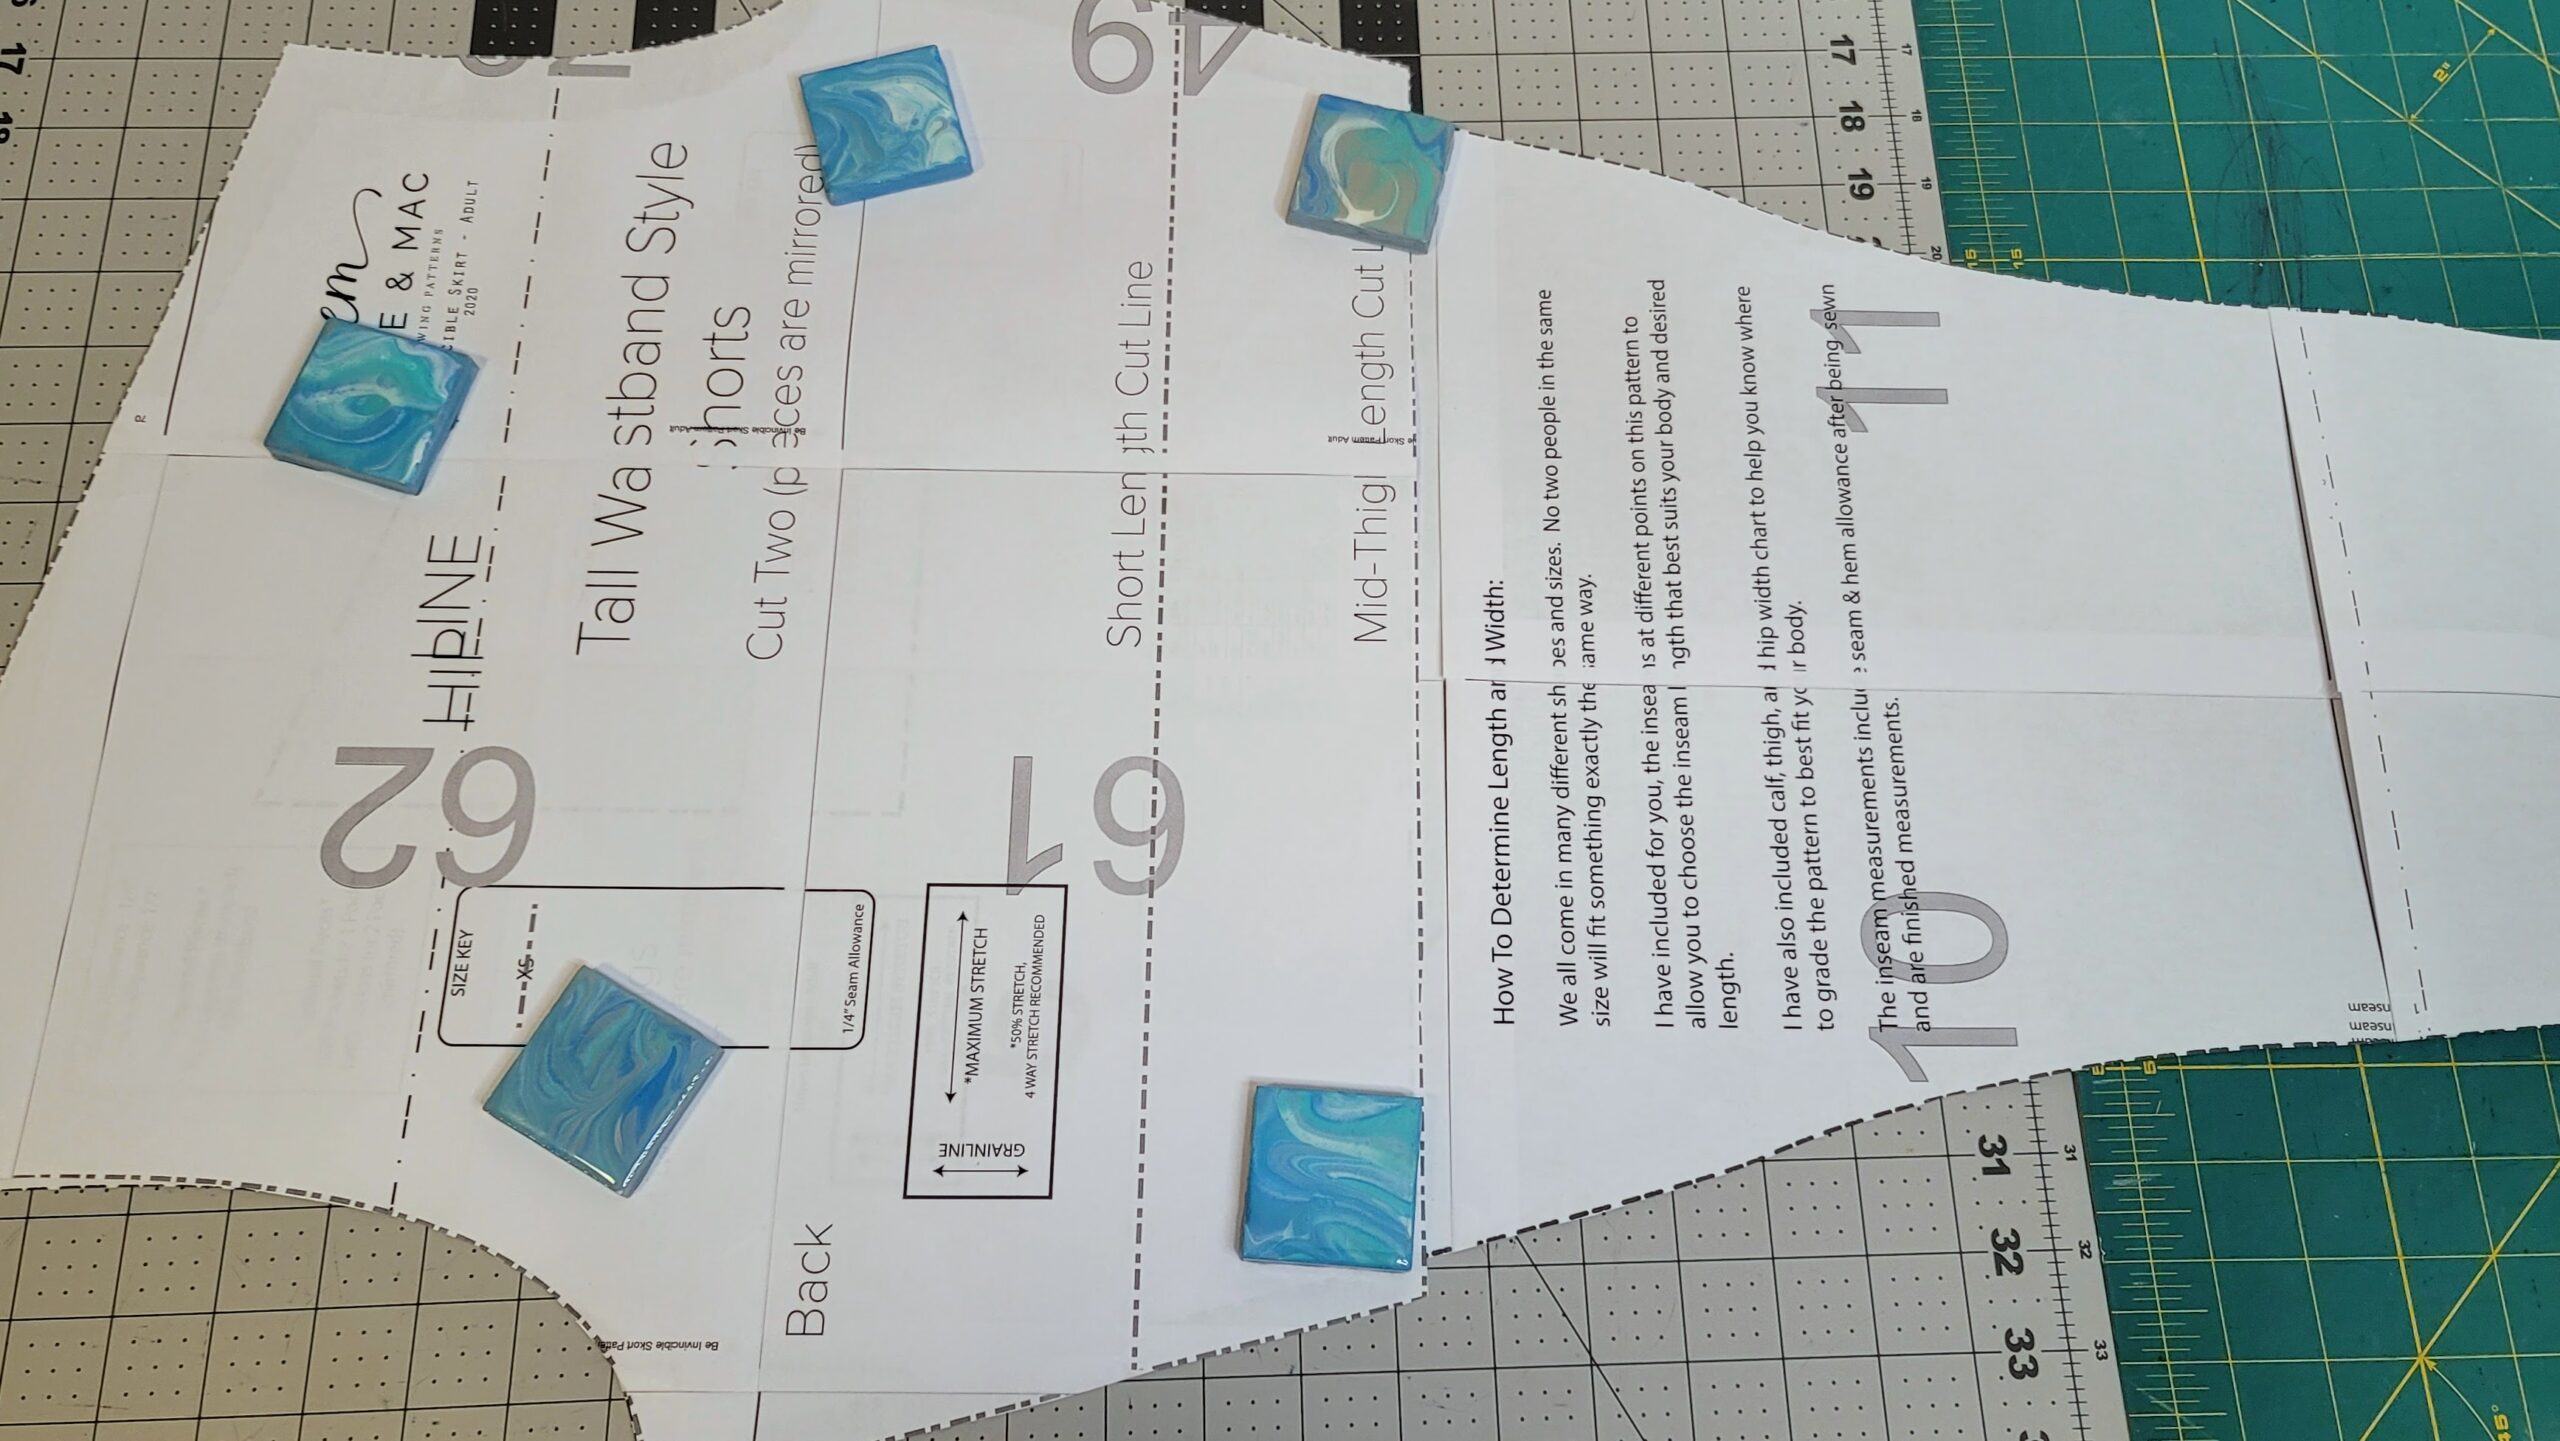
You'll notice that the Be Invicible shorts pattern piece is slightly wider than the Urban leggings piece, that's okay. We will just grade the two pieces together when we cut. You want to keep the waistband width the same as the Be Invicible Shorts original since this will attach to the same patterns skirt later.
There is a lengthen/shorten line on the leggings pattern where you can add or subtract length to the leggings if you need it. It's a nice straight line that you can line up the two pattern pieces with to make sure you are straight on grain.

You will want to center the width of the shorts piece with equal amounts of overhang to the front and back sides of the leggings piece.
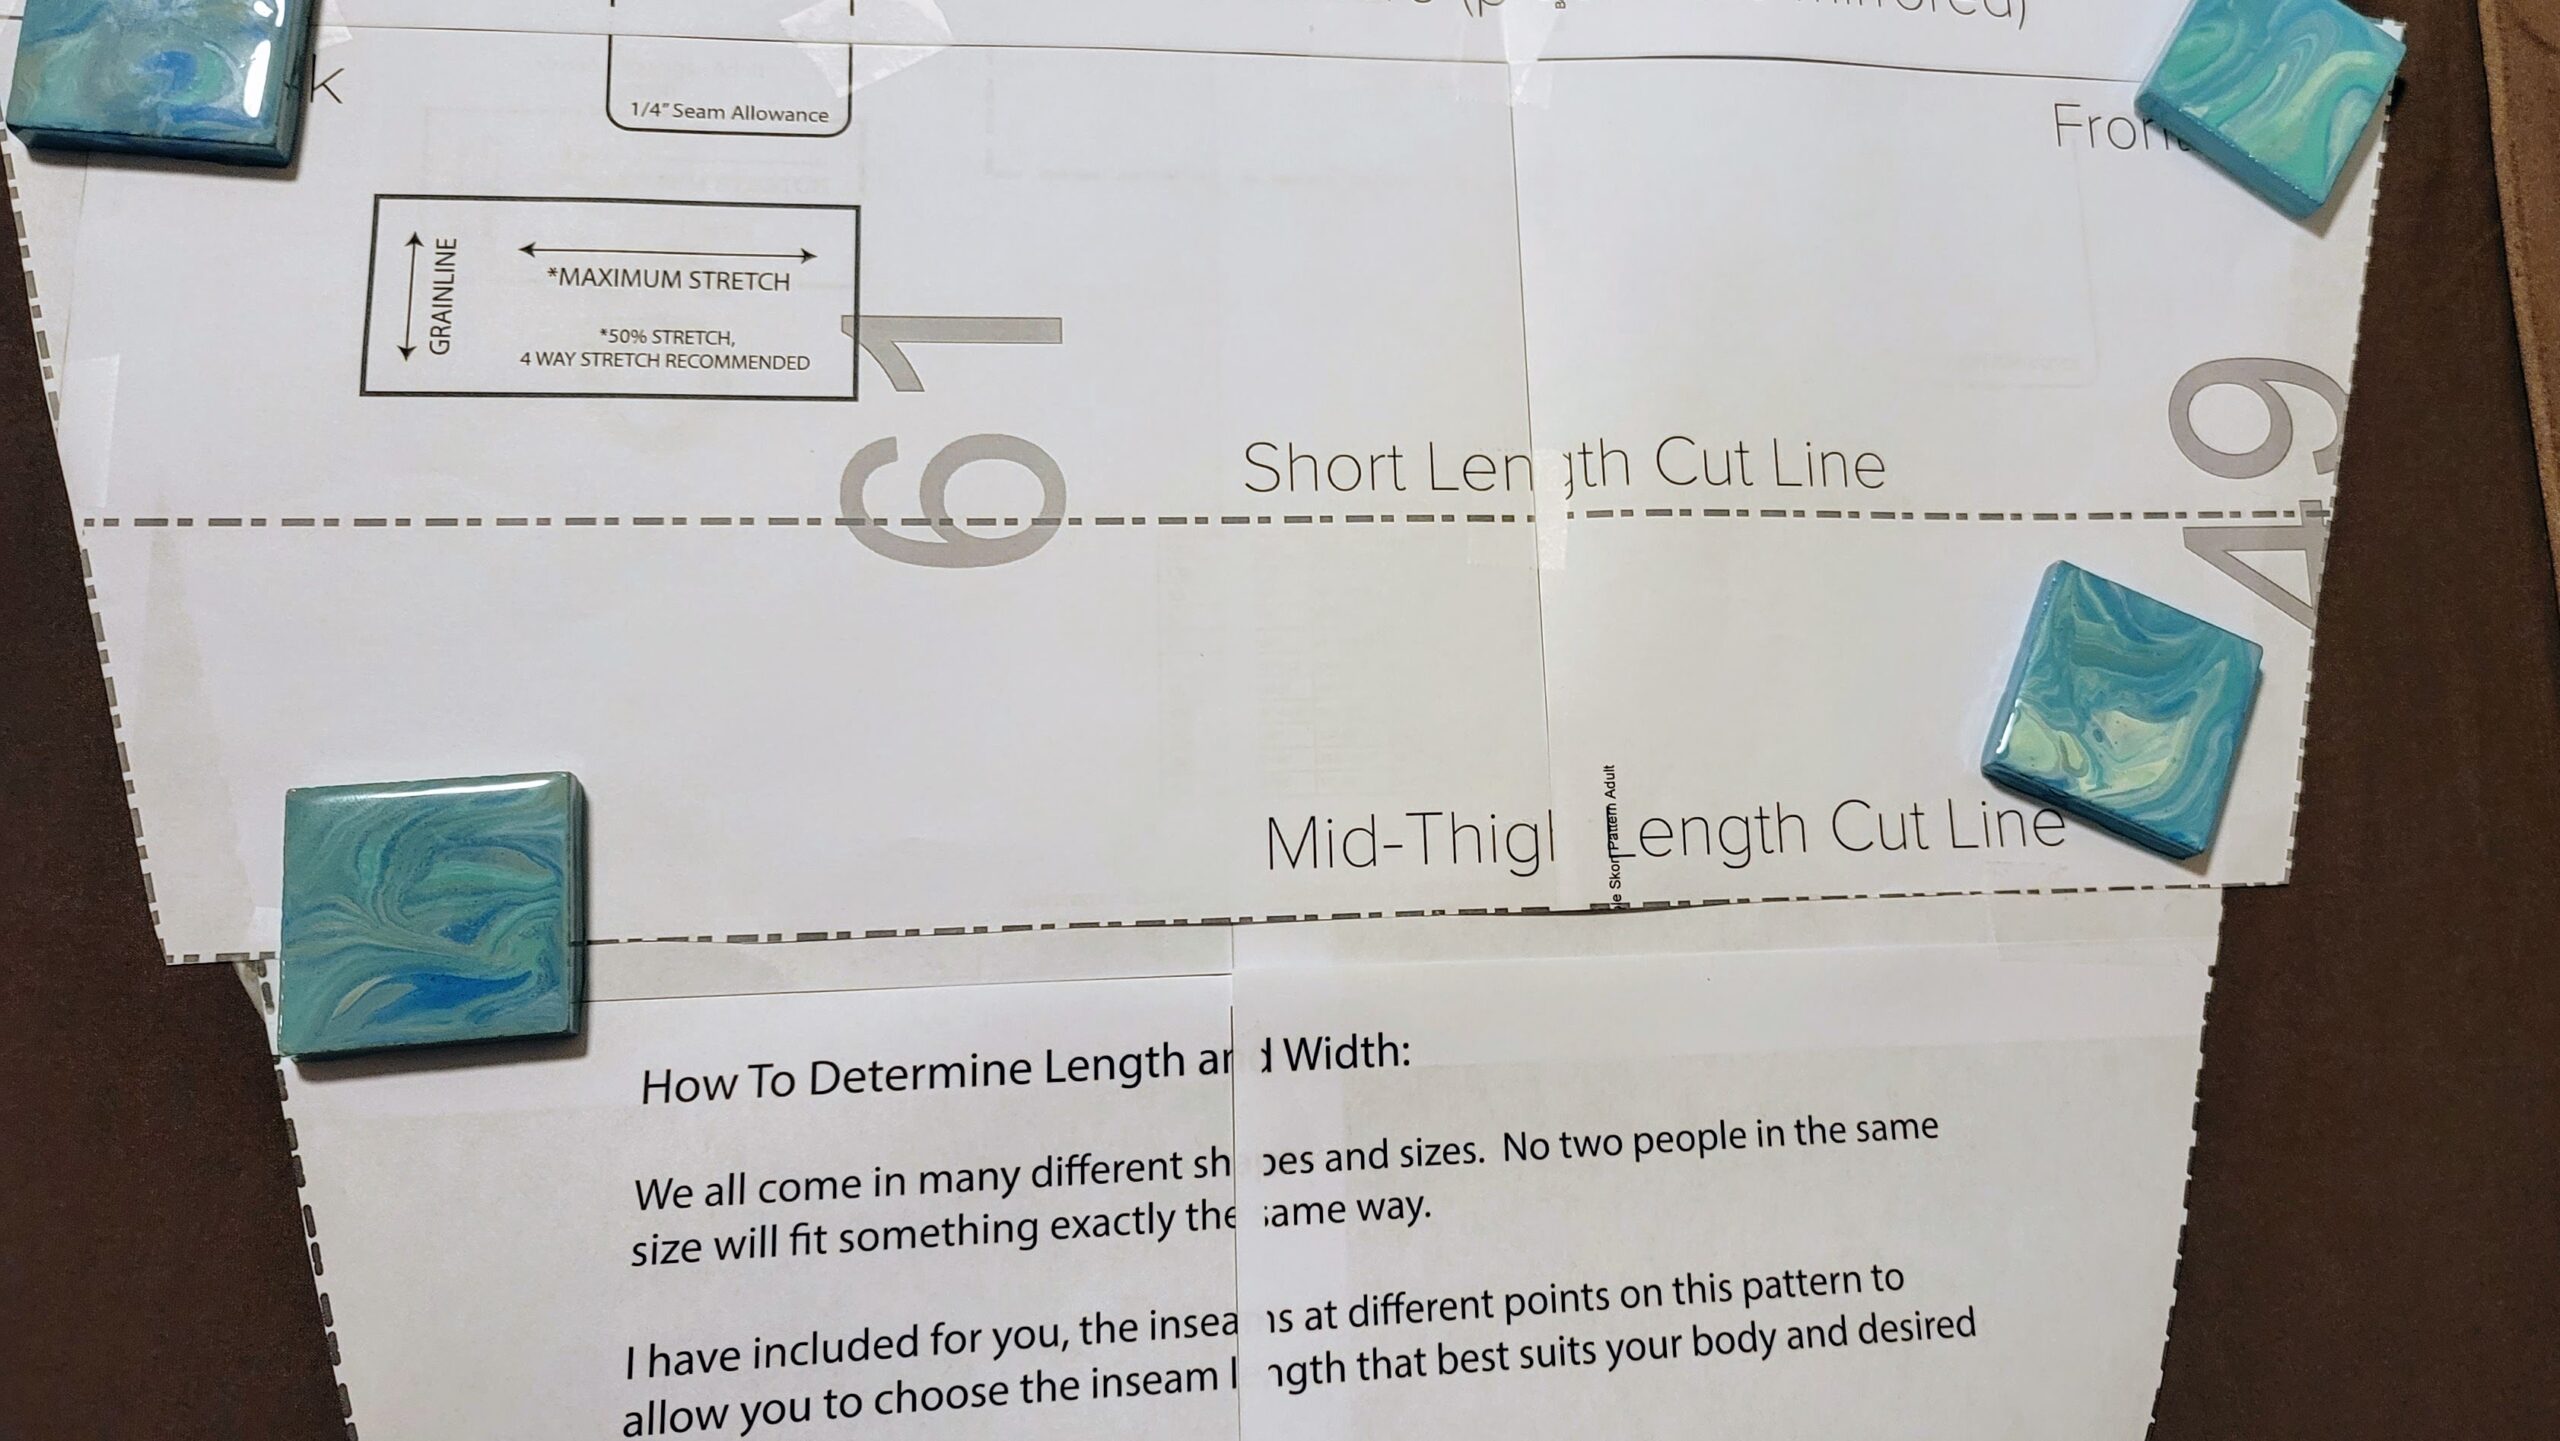
I taped my pieces together so I didn't have to trace anything onto another sheet of paper.
Now you are ready to cut it out!
You will need two mirrored cuts as the instructions on the pattern piece states. To cut on the fold or to cut with the front side of the pattern piece and then the back side? The ability to cut on the fold with be dependent on your fabric width and size you are making. But if you can cut on the fold, it is faster as you only have to cut once. But, it does also use more fabric and create more fabric waste. So, weigh your pros and cons here folks.
I made a super short video as seen below so you can see the gradual grade on each side of the shorts to leggings sides.
If you feel nervous about just cutting the fabric, you can use a fabric marking tool to draw that diagonal line from the shorts down to the leggings before cutting.
That's all there is to the the mash part! Now just cut the rest of the pieces from the Be Invincible Pattern and follow the instructions from the PDF file for construction. You won't need any of the other pattern pieces from the Urban Leggings Pattern for this mash.
My Make

Options
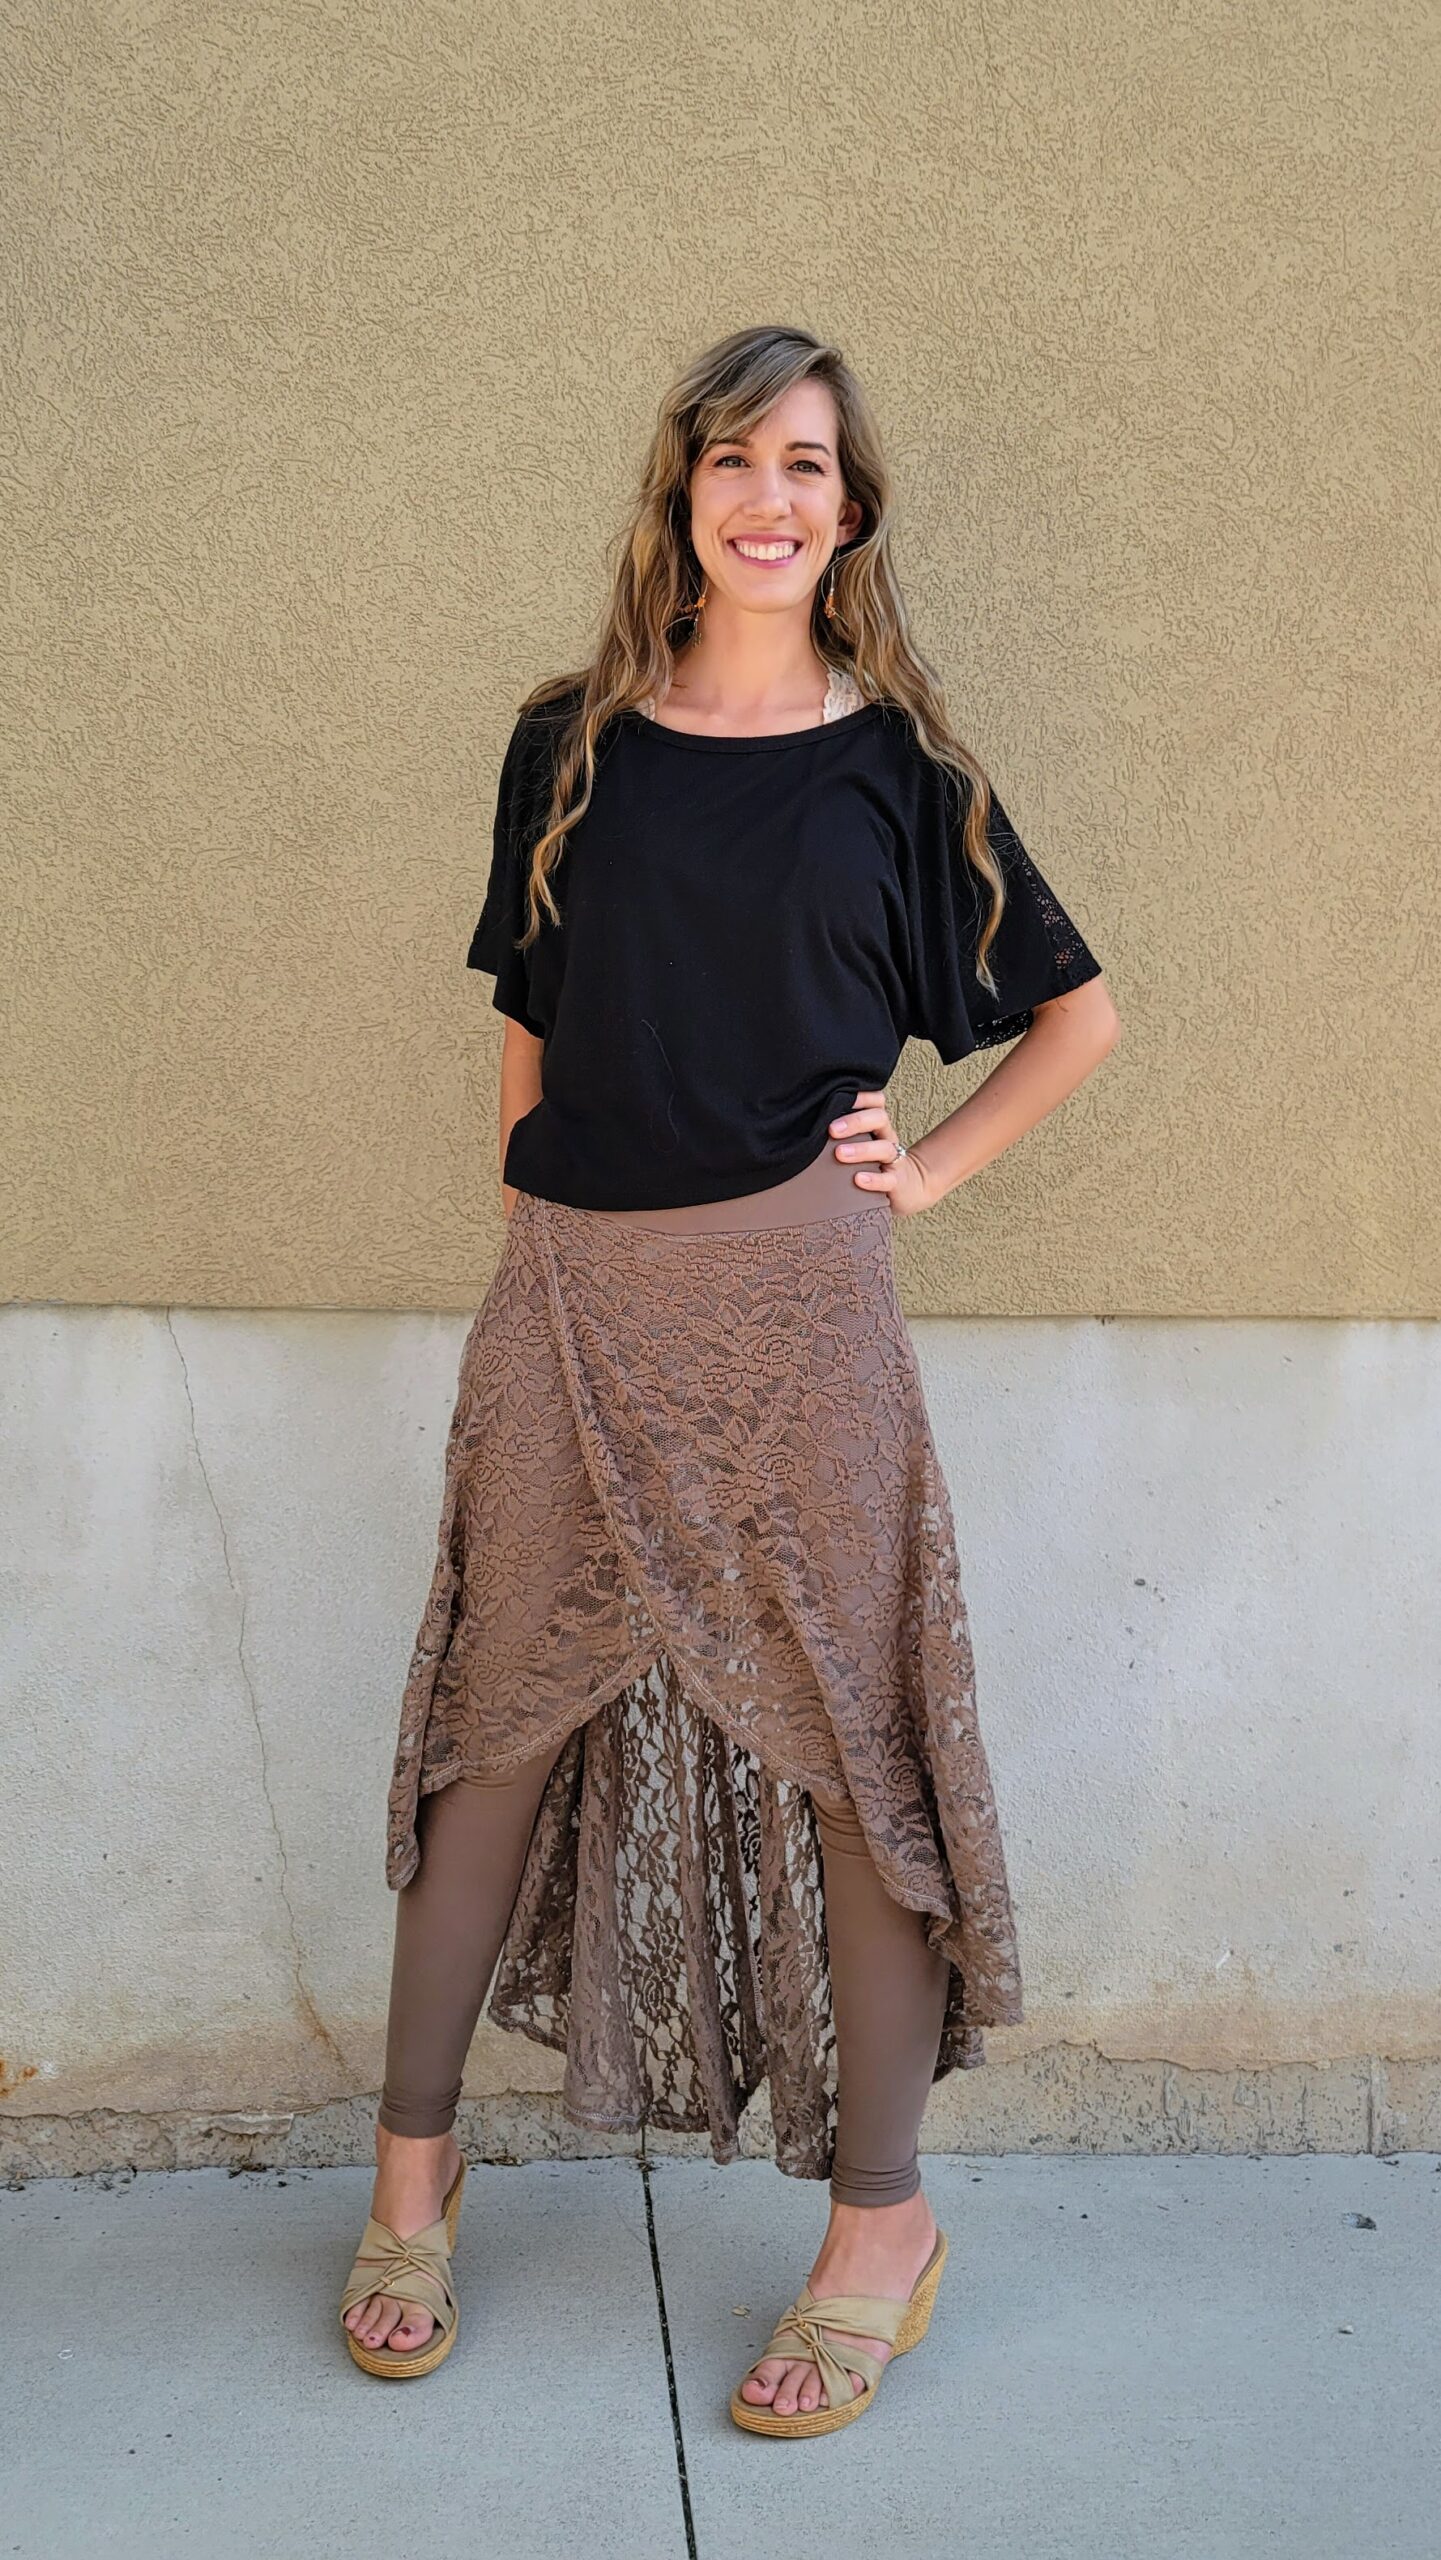
I chose to make the wrap skirt on mine so that the sides of the skirt overlap in front and cover the front portion of the leggings. But, you could make it with the open front too!
I went with the tall waistband style for more coverage. Plus having a skirt hit at the natural waist instead of low hips is in style right now.
(pssst... I also didn't hem the leggings. I just tucked my serger thread up and folded the hem up. If I do it this way I can leave the angle scrunched up like in the pictures or flat by folding up a bit higher).
Fabric
I used DBP (Double Brushed Polyester) for the leggings that I picked up a while back from an online fabric shop. For the skirt, I used a stretch lace fabric from Walmart that was SUPER cheap. I think it was $2/yd, so I got 5 yards of course.
I chose lace so that the leggings would pop through underneath, but you could certainly do a solid skirt on top too!
Styling
I wore my new Ellie and Mac...Skiggings? Skirtings?... Anyway, I wore my new make with a loose fitting black dolman top with a lacy back.
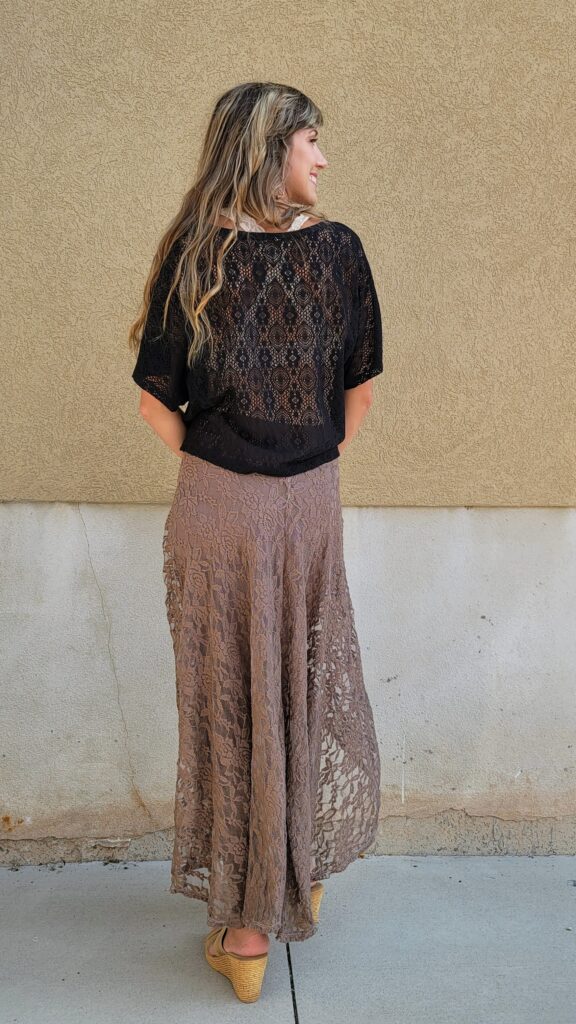
I think this would also be really cute with a shorter slouchy sweater. It could also be really cute to go with a dancer style and wear a body suit or tight fitting top and heels.
Your Turn
Now you can make one too!
I hope this tutorial was a useful and fun read for you. If you have any questions, feel free to reach out to me!
You can find Let's Go Hobby on:

See you all next time!
(Written by: Jessice Luckart)
If you're a beginner, check out our free sewing patterns here.
See our video tutorials for beginners here.


