Hi everyone!
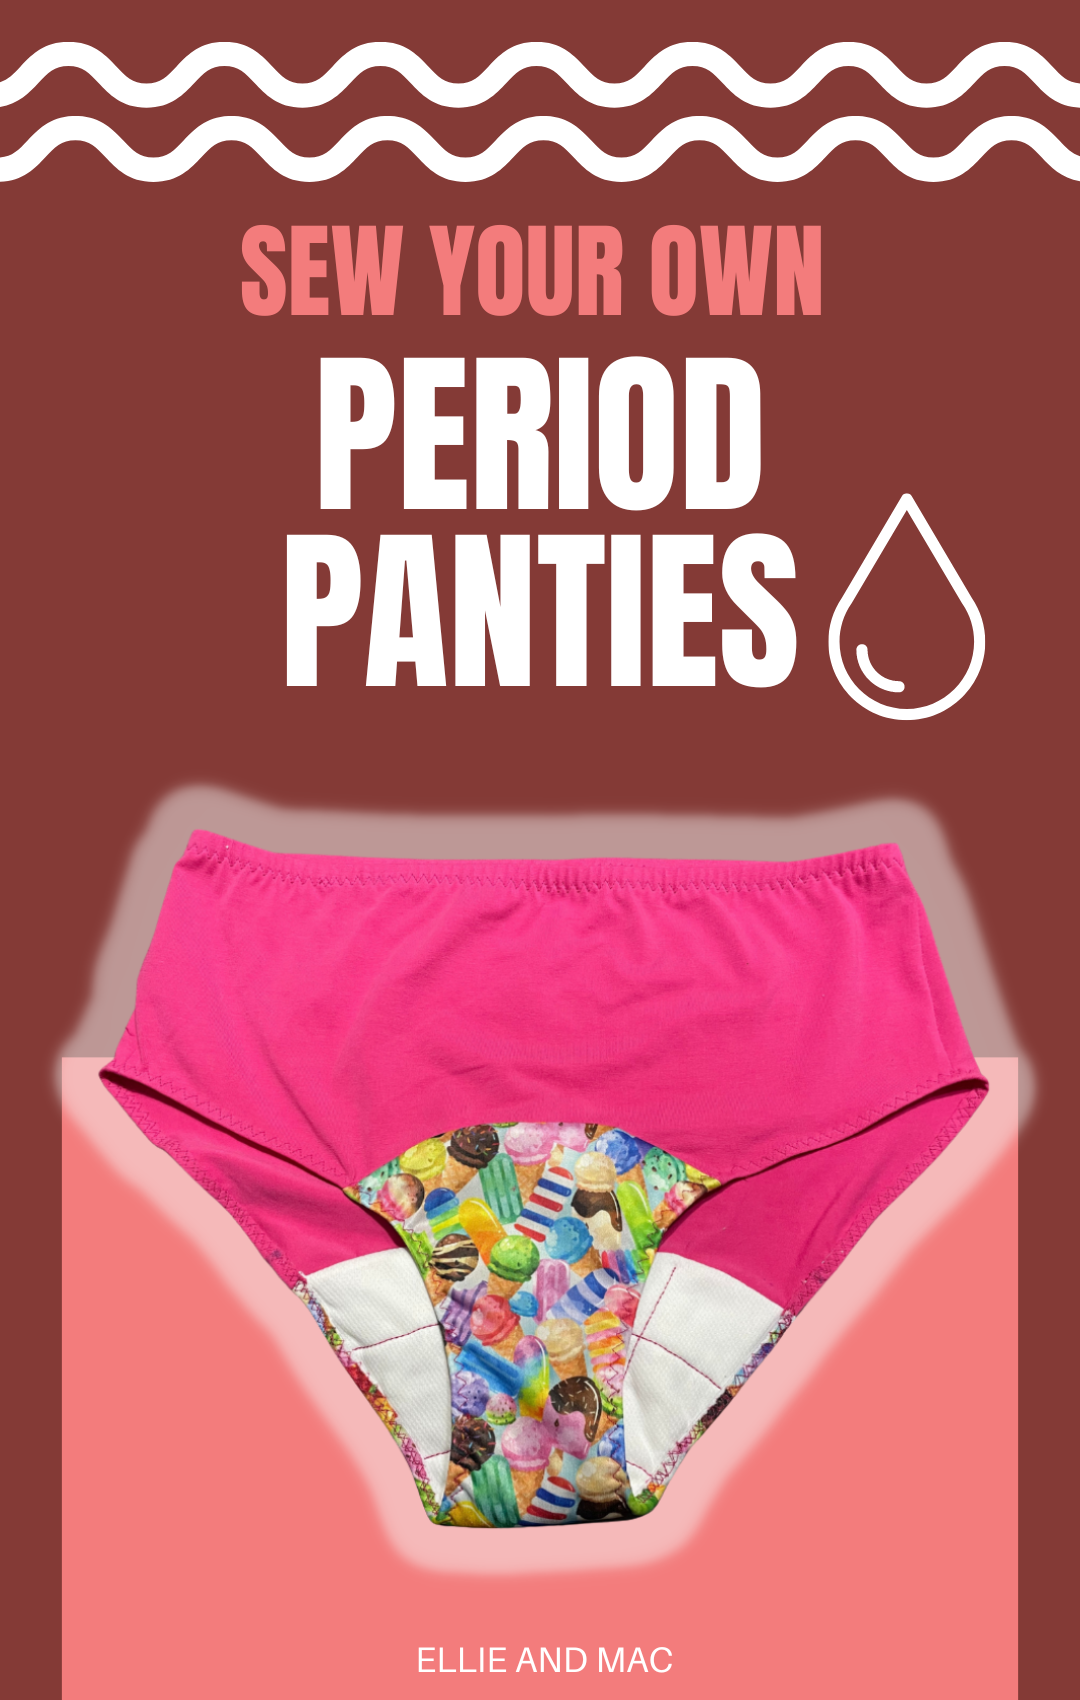
This is Leonie with another blog post for Ellie & Mac. I am extremely excited to share with you how to hack the Feel Frisky Panties Pattern into period panties. That's right! Today, we will not shy away from discussing menstruation. These panties are a good eco friendly alternative from pads or tampons. They are also great for people with mild urinary incontinence. Plus, this hack can work with other underwear patterns such as the Kid's Cami, Undies, & Shorts Pattern. Perfect for teenagers.
Before jumping into the tutorial, I want to talk a little bit about the fabric you would need to make these period panties, aside from the normal fabric we use to make panties:

-
The backer: a waterproof fabric such as PUL or SoftShell. I use PUL for this pair.
-
The core: an absorbent fabric such as flannel, terry cloth, microfiber or Zorb also call Absorb Diamond that I use.
-
The topper: a stay dry fabric such as flannel, cotton, fleece or jersey/athletic mesh. I used athletic mesh this time, but I often use funky printed flannel.
When choosing which fabric to use for each layer, it’s important to have in mind the desired properties of the fabric. For the topper some people will prefer to have natural fiber fabric rather than synthetics one since its touch’s the skin. For the core, you must take your period flow into consideration. Each fabric has a different level of absorption. For example, if you decide to use flannel for the core, you may need to have more than one layer to achieve the same level of absorption as terry cloth. There is a lot of information on the Internet on this subject, I suggest taking some time to research what is best for you.
If you don’t yet have the patterns needed for this tutorial, you can find it here using my referral link:
https://www.ellieandmac.com/products/feel-frisky-panties-pattern?aff=2624
Now that you have all the information you need, we can start this tutorial. First, make a copy of your front and back pattern pieces. You will be using these to create your new pattern.

-
Tape or glue together your front and back pieces on the crotch area by overlapping the pieces. You will need to overlap them the length of the seam allowance, ¼’’ for this pattern.

-
Using one of your favorite pads, mark the beginning and the end of where you would have put the pad in your underwear (marked in blue in the picture). This is what will guide you for the length of the absorbent part. If you prefer more length (like me!), this is where to add it. I personally add 1’’ of length on the front part and 2’’ on the back part (mark in pink in the picture) since I tend to be more of a back bleeder during the night.

-
Using our marks made on the previous step, we will now draw a curved line on both extremities of the middle part, which will be the absorbent part of the panties (mark in pink in the picture). I prefer making a curved line than a straight line since our body have curves and it will give a better result.

-
Cut your pattern piece into three different pieces. You will cut on the curved line made in the last step.

-
You now have your three pieces. To avoid making mistakes later, identify the different pieces as illustrated.

-
Now we can add back the seam allowance we removed in step one, at each new curved lines of the back and front and both end of the center piece.
Tape or glue a small piece of paper where you need to add the seam allowance. To help drawing the new line, I measure my seam allowance length of ¼’’ and make many little dots to create it.

-
Now that all your pieces have their seam allowance, we will be able to cut our pieces of fabric.

-
Cut one front on the fold, and one back on the fold using the regular fabric you love using when making this pattern. I use cotton Lycra for this pair.

-
Cut on the fold the middle part three times:
-
One time using your waterproof fabric (I use PUL)
-
One time using your absorbent fabric (I use Zorb also call Absorb Diamond)
-
One time using your topper fabric (I use athletic mesh)
-

Remove ¼ to 3/8’’ all around the absorbent piece, which will help prevent any bulking, particularly when sewing your elastic. This step is essential, you will thank me later.
-
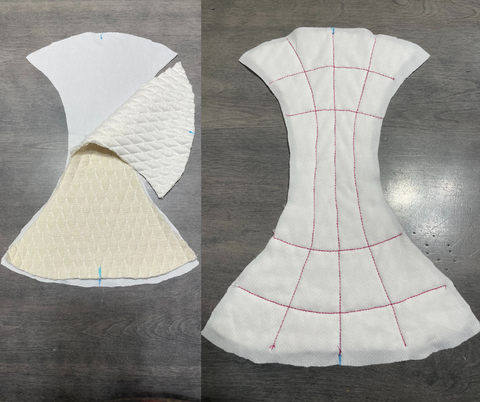
It is now time to start sewing! Pin or clip your coating fabric and your absorbent fabric in place. The wrong side of the topper onto the right side of the absorbent fabric. Sew together like you want. I free stitch this part and go with my creativity. I normally do a minimum of three vertical stitch lines.

-
It now time to clip together and sew your waterproof fabric, your front, and the piece you created in the previous step.
-
Lay your backer fabric right side up.
-
On top of it, put your front right side down, the two pieces should be right side together.
-
Finally, put your top layer right side down, so that the wrong side of the front touch the right side of the topper.
-
Starting by the middle and working your way each side, clip together those three layers. Sew.

-
You have sewn together your front and your middle part. You seam must be hide between the layer of the middle part.

-
Clip together the back part and the waterproof part, right side together. Starting by the middle and working your way each side, clip together those two layers. Sew a basting stitch.
-
It is now time for the trickiest part of this hack. Take your time to be sure you clip and sew the pieces correctly. Trust me, it is worth it. By sewing them this way, you seam will be enclose between the middle layers, providing a professional look.
-
Orient the big piece so the front, back and the waterproof layer are wrong side up.
-

-
Take your top middle piece and upturn it so the right side of your fabric is on the wrong side of the back piece.

-
Clip the middle together and pull it on the side to continue clipping your pieces together.

-
If you are like me and want to be sure you won't have to reach for the seam ripper, put back your pieces in place and checked if your seam will be hide between the waterproof layer and the top layer. If so, it’s time to sew. Otherwise, track back your step to find your mistake.
-
Sew together.

-
Bravo, you have completed all the steps of this tutorial. You can now proceed with the regular steps of the Feel Frisky Panties Pattern:
-
Sew the side seam of your front and back together.
-
Sew your waist and legs elastic with your preferred method and…
-

Voila! You now have your own period panties!!!

I hope you enjoy learning how to create your very own period panties. You will see, it's so much more fun having our monthlies with homemade special panties. Can’t wait to see your beautiful make on Ellie & Mac Facebook Group.
If you like, feel free to follow me on social media @sew_with_leonie on Instagram or @lebazarcreatifdeleonie on Facebook for my French sewist friend.
(Written by: Leonie Levesque)