

Hi friends! Amy here again today, bringing you another fun tutorial… so today we are going to be working with the Wrapped in Love bodice pattern. In this part we are hacking the neckline to add a sweetheart peekaboo. In the second part of this blog we are doing a major hack to create a very full and dramatic sleeve. There will also be a little extra mini hack on the Tres Belle skirt. Read on to find out more…
The fabric I’m using today is brushed cotton jersey and can be purchased from ‘Renas Fabrics Galore’ on Facebook. I used a thin stretch lining fabric to line my bodice pieces, not sure of the composition but it’s very thin so doesn’t add any weight to the dress.
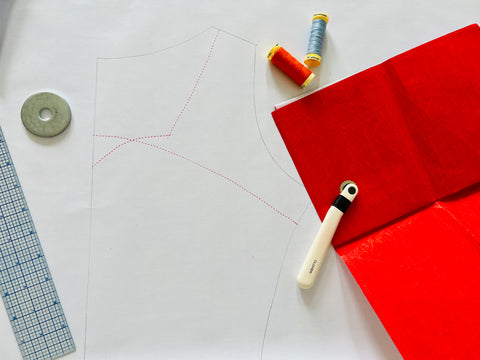
THINGS YOU WILL NEED:
-
Pencil/pen
-
Ruler
-
Paper
-
Scissors/rotary cutter
-
Ellie and Mac Wrapped in Love Pattern (also Tres Belle Pattern if you wish to use that skirt as I did)
-
Fabric as per the pattern instructions
-
Pins or clips
Optional but useful:
-
Pattern weights
-
Heat erase/wash away pen or dressmakers’ chalk etc
-
Carbon paper and tracing wheel
-
scotch/washi tape
-
iron on interfacing
CREATING THE HACKS:
So the first thing you will need is the Wrapped in Love bodice piece. We are not altering the back bodice in any way so you can go ahead and cut your two mirrored back bodice pieces. Now fold the centre back vertically along the indicated fold line – this is because the front bodice is cut on the fold so you do not need the additional seam allowance required for the back bodice. I like to fold this out the way so I don’t forget later and end up cutting my front bodice the wrong size.

The ‘cut on fold’ line is indicated on the pattern for the front bodice.
I then started sketching on the back of the pattern piece to see what kind of shape I wanted for my peekaboo – you could do any shape you want, rounded, sweetheart, a ‘v’, anything you can think of, the only rules I would recommend you follow are 1. to extend the lower front bodice piece right up to the shoulder seam (this helps stabilise the neckline more so it is less prone to gaping), 2. to have the overlap of the upper and lower bodice pieces overlapping more than you think you want (this is because once the seam allowance is taken away, plus the pieces stretch slightly over your chest, the bodice pieces will end up sitting a little further apart than it looks on the pattern you have drawn), and 3. to make sure that there is enough height in the upper front bodice piece for you to be able to have space to pull it right side out once the lining is attached.

You can draw your pattern however you like, but as a rough guide, I made my upper front bodice piece finish about 3.5” down from the neckline, and the lower front bodice piece start about 4.75” from the neckline, as indicated in the picture above. I have drawn my actual pattern piece lines in red and dark green, and in pencil I have drawn in where the seam allowance will be so you can see how much the peekaboo will open up once you take it down to the seam allowance.
Next you need to make two copies of the front bodice pattern piece. I would suggest using a tracing wheel on carbon paper.

You will end up with two copies like this, from which you can cut one upper front bodice and once lower front bodice piece:

You can overlap the pattern pieces now and see that they fit together to match the size of the original pattern piece.


Now you have your front bodice pieces all ready. You need to cut you front bodice pieces out of your main fabric and lining.
Cut pieces of clear elastic and sew along all your main fabric bodice neckline edges on the wrong sides– I know, I know, I often skip clear elastic too, but for this hack it’s really important because it helps to stabilise the neckline and stops it from stretching out and gaping, so you better do it!
I tried to take a picture with the clear elastic laid out but you can’t see it very well against the fabric… hopefully it’s still helpful…For my sweetheart peekaboo shape I cut the elastic into 4 pieces so it didn’t get lumpy bending it round the corners, and attached it with a zigzag stitch within the seam allowance.

So your clear elastic is attached to the top and bottom of your upper front bodice, the top of your lower front bodice, and the neckline of the back bodice while you’re at it. You can now attach the lining. This can be done a few different ways but here’s how I did it.
Take your main and lining upper front bodice pieces and pin them right sides together along the upper neckline and peekaboo cutout lower edge. Sew these seams using a 0.25” seam allowance and a stretch stitch or serger. I added contrast piping to edge my peekaboo cutout – this was non stretch so might not work if you need more stretch across the bust. If you want to add piping like I have, I would baste it to the main fabric first so it is easier to get it in the right place when you then add the lining. It took me a metre of piping to edge my bodice pieces.
Your upper front bodice piece is now attached to the lining at the top and bottom edge, and the wrong side of the fabric is facing you. Reach inside and pull right sides out. Press well and topstitch if you wish with a stretch stitch to hold everything in place.
Now do the same for the top edge of your lower front bodice piece. Pin your main and lining fabrics right sides together along the neckline. Seam with 0.25” allowance and a stretch stitch. Turn right side out, press and topstitch if you wish. Attach your back bodice main and lining fabric along the neckline in the same way.
At this point you can baste your upper and lower front bodice pieces together – you can refer to your pattern pieces if needed to make sure you are aligning them correctly. I would recommend basting along the shoulder, armscye, and whatever extension there is below the armscye.


Next I sewed my front and back bodice shoulder seams together, again using a 0.25” seam allowance and stretch stitch.

We have finished the bodice pieces, and your Peek-a-Boo Sweetheart Neckline is done! Stay tuned for the second part of this Glam Up Tutorial in which I show you how to create a dramatic statement sleeve.

P.S. When you don't want to add the sleeve, you can finish the dress as written in the tutorial or add a different skirt (like I did).
(Written by: Amy Day)


