
When you've found a beautiful sewing pattern, just know you can do much more with it than the original design!
This blog will show how you can recreate my favorite hack: the cropped, fitted rash guard. And remember: the options are endless!

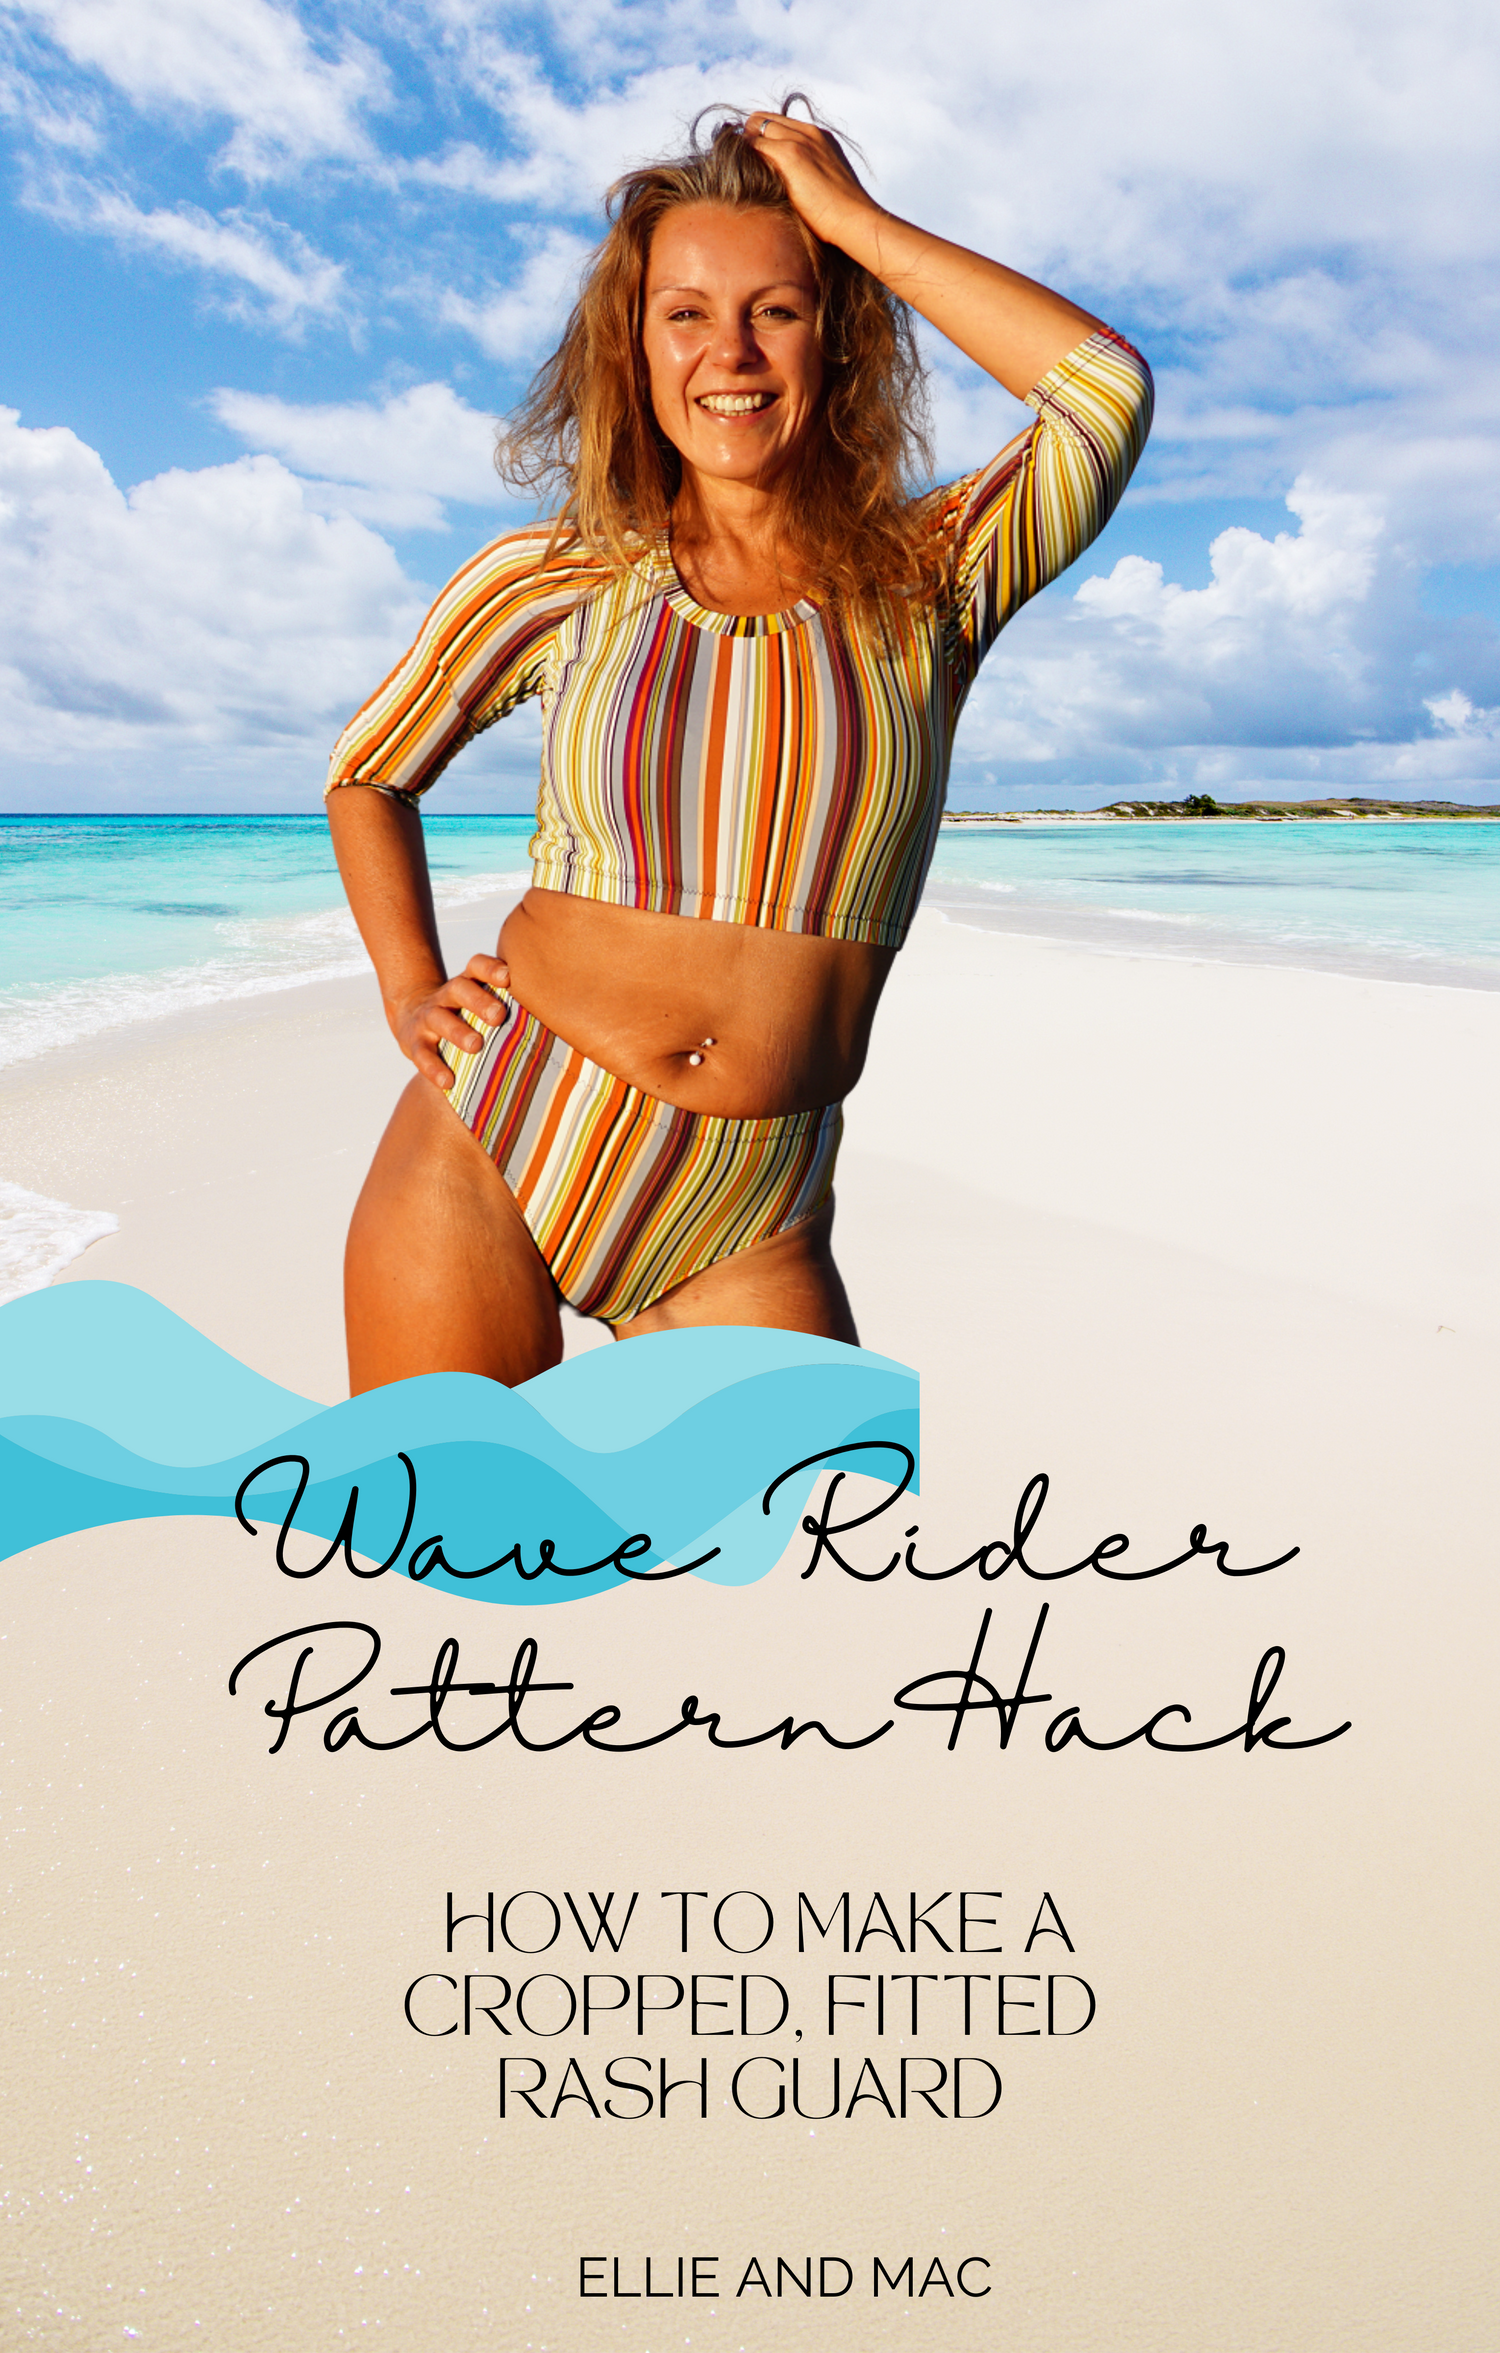
These pictures show the cropped, fitted rash guard version with invisible elastic.
Create a Fitted, Cropped Rash Guard Step by Step!
You need:
- the swimsuit bodice
- the swimsuit sleeves
- the rash guard's neckline
- the swimsuit shelf bra (optional)
- a zipper (optional)
In this tutorial, I will show you how to create this rash guard hack without lining, a zipper, or a Shelf Bra. It is possible to add a Shelf Bra and a zipper to the fitted, cropped rash guard, you can use the original instructions to do this. Don’t forget that when you want to add the shelf bra from the pattern, you need to line the front bodice. Lining the back bodice is optional.
Step 1 Determine the length of the Rash Guard.

A beautiful length for this cropped version is to let it hit at the waistline. Of course, you are free to choose a longer or shorter length.
First, you need to measure your side waist and adjust the front and back bodice of the swimsuit pattern piece for the side waist (otherwise, it won't hit your waistline).
Then choose if you want to use exposed elastic or regular elastic. You start at the waistline and add (plus) the length from your regular elastic or subtract (minus) the length for exposed elastic + 0.25" seam allowance (again, otherwise, the top won't hit you at your waistline).
I used 0.5” elastic for mine. So I cut my front and back pattern pieces 0.5” beneath the waistline. When you want to use exposed elastic, measure the height of your elastic and add 0.25” to it.
Grab the front bodice of the swimsuit and draw a line at the length that you have calculated (red line), and cut.
Step 2 Prepare your back piece.

Repeat step 1 with your swimsuit back piece.

Now you have your front and back pattern piece at the correct length.
Step 3 Choose your neckline
High Neckline
You can use the high neckline from the swimsuit. Make sure to remeasure the circumference of the neckline and take 75- 85% (depending on your fabric stretch) of that measurement. Add 0.5" to this number, and this is the new length of the neckband with seam allowance included. Cut out a new neckband by using the rash guard neckband pattern piece as a template that you adjust to the new length.
Lower Neckline
When you want a lower neckline, you can use the neckline from the rash guard.

You can use the original rash guard piece as a template to transfer the lower neckline, as shown in this picture. The new neckline will be a bit different in length, so that you can do the same thing here: remeasure the circumference of the neckline and take 75- 85% (depending on your fabric stretch) of that measurement. Add 0.5" to this number and this is the new length of the neckband with seam allowance included. Cut out a new neckband using the rash guard neckband pattern piece as a template that you adjust to the new length.
Step 4 Sleeves
This step is just a reminder: don’t forget to use the sleeves of the swimsuit!
Step 5 Sew, sew, sew and add the elastic.
Sew your new rash guard according to the original instructions, but skip the hemming of the bottom. Here you are going to add the elastic to the bottom bodice.
Regular Elastic
Sew your elastic into a loop and place it to the wrong raw edge of the bottom by quartering the bottom line and the elastic. Stretch the elastic in between and pin. Sew the elastic to the bottom and flip it over once towards the wrong side, and topstitch with your preferred stretch stitch.
Exposed Elastic
When you want to use exposed elastic, sew your elastic into a loop and lay your elastic with right sides together to the bottom of your top. Sew the raw bottom edge of the fabric to the elastic while using your preferred stretch stitch.

And you are done! Admire your new cropped, fitted rash guard.
- the swimsuit sleeves
- the rash guard's neckline
- the swimsuit shelf bra (optional)
- a zipper (optional)
In this tutorial, I will show you how to create this rash guard hack without lining, a zipper, or a Shelf Bra. It is possible to add a Shelf Bra and a zipper to the fitted, cropped rash guard, you can use the original instructions to do this. Don’t forget that when you want to add the shelf bra from the pattern, you need to line the front bodice. Lining the back bodice is optional.
Step 1 Determine the length of the Rash Guard.
A beautiful length for this cropped version is to let it hit at the waistline. Of course, you are free to choose a longer or shorter length.
First, you need to measure your side waist and adjust the front and back bodice of the swimsuit pattern piece for the side waist (otherwise, it won't hit your waistline).
Then choose if you want to use exposed elastic or regular elastic. You start at the waistline and add (plus) the length from your regular elastic or subtract (minus) the length for exposed elastic + 0.25" seam allowance (again, otherwise, the top won't hit you at your waistline).
I used 0.5” elastic for mine. So I cut my front and back pattern pieces 0.5” beneath the waistline. When you want to use exposed elastic, measure the height of your elastic and add 0.25” to it.
Grab the front bodice of the swimsuit and draw a line at the length that you have calculated (red line), and cut.
Step 2 Prepare your back piece.
Repeat step 1 with your swimsuit back piece.
Now you have your front and back pattern piece at the correct length.
Step 3 Choose your neckline
High Neckline
You can use the high neckline from the swimsuit. Make sure to remeasure the circumference of the neckline and take 75- 85% (depending on your fabric stretch) of that measurement. Add 0.5" to this number, and this is the new length of the neckband with seam allowance included. Cut out a new neckband by using the rash guard neckband pattern piece as a template that you adjust to the new length.
Lower Neckline
When you want a lower neckline, you can use the neckline from the rash guard.
You can use the original rash guard piece as a template to transfer the lower neckline, as shown in this picture. The new neckline will be a bit different in length, so that you can do the same thing here: remeasure the circumference of the neckline and take 75- 85% (depending on your fabric stretch) of that measurement. Add 0.5" to this number and this is the new length of the neckband with seam allowance included. Cut out a new neckband using the rash guard neckband pattern piece as a template that you adjust to the new length.
Step 4 Sleeves
This step is just a reminder: don’t forget to use the sleeves of the swimsuit!
Step 5 Sew, sew, sew and add the elastic.
Sew your new rash guard according to the original instructions, but skip the hemming of the bottom. Here you are going to add the elastic to the bottom bodice.
Regular Elastic
Sew your elastic into a loop and place it to the wrong raw edge of the bottom by quartering the bottom line and the elastic. Stretch the elastic in between and pin. Sew the elastic to the bottom and flip it over once towards the wrong side, and topstitch with your preferred stretch stitch.
Exposed Elastic
When you want to use exposed elastic, sew your elastic into a loop and lay your elastic with right sides together to the bottom of your top. Sew the raw bottom edge of the fabric to the elastic while using your preferred stretch stitch.
And you are done! Admire your new cropped, fitted rash guard.

Bonus!
As a bonus, we throw in some extra length notes:
Low Cropped Length, Fitted Rash Guard

Follow step 1: the fitted cropped version, and cut at the high hipline instead of at the waistline.
Full Length, Fitted Rash Guard


Take your rash guard front and back pattern pieces and lay your front and back pattern pieces on top of the swimsuit pieces. Match at the arm lines. Copy the length of the regular rash guard to the swimsuit pattern piece.


Remove the rash guard pattern pieces and lengthen the side seams towards the new length.

Your new bottom line is ready now and includes a 0.5" hem allowance. Cut your "new" front and back pattern pieces and use the relaxed rash guard instructions from the pattern to sew the pattern.
Cropped, Relaxed-Fitting Rash Guard
TIP: You can also make a relaxed-fitting cropped version from the rash guard sewing pattern by following the steps for the cropped, fitted version (and use your rash guard pattern instead).
For the low-cropped version: measure the distance between the high hip line and waistline at the swimsuit front and back pattern pieces, and use this measurement to draw a high hip length line at your rash guard pieces.
Low Cropped Length, Fitted Rash Guard
Follow step 1: the fitted cropped version, and cut at the high hipline instead of at the waistline.
Full Length, Fitted Rash Guard
Take your rash guard front and back pattern pieces and lay your front and back pattern pieces on top of the swimsuit pieces. Match at the arm lines. Copy the length of the regular rash guard to the swimsuit pattern piece.
Remove the rash guard pattern pieces and lengthen the side seams towards the new length.
Your new bottom line is ready now and includes a 0.5" hem allowance. Cut your "new" front and back pattern pieces and use the relaxed rash guard instructions from the pattern to sew the pattern.
Cropped, Relaxed-Fitting Rash Guard
TIP: You can also make a relaxed-fitting cropped version from the rash guard sewing pattern by following the steps for the cropped, fitted version (and use your rash guard pattern instead).
For the low-cropped version: measure the distance between the high hip line and waistline at the swimsuit front and back pattern pieces, and use this measurement to draw a high hip length line at your rash guard pieces.


